Introduction
Getting started with Streamfold
This is a quickstart guide to getting started with Streamfold. In this guide you'll connect your first data source to Streamfold and unlock the power of streams in Streamfold.
On the completion of this guide you will have:
- Connected your first Streamfold source
- Connected your first Streamfold destination
- Verified data is flowing through Streamfold
- Built a filter using properties of your telemetry
- Transformed data live in a Stream
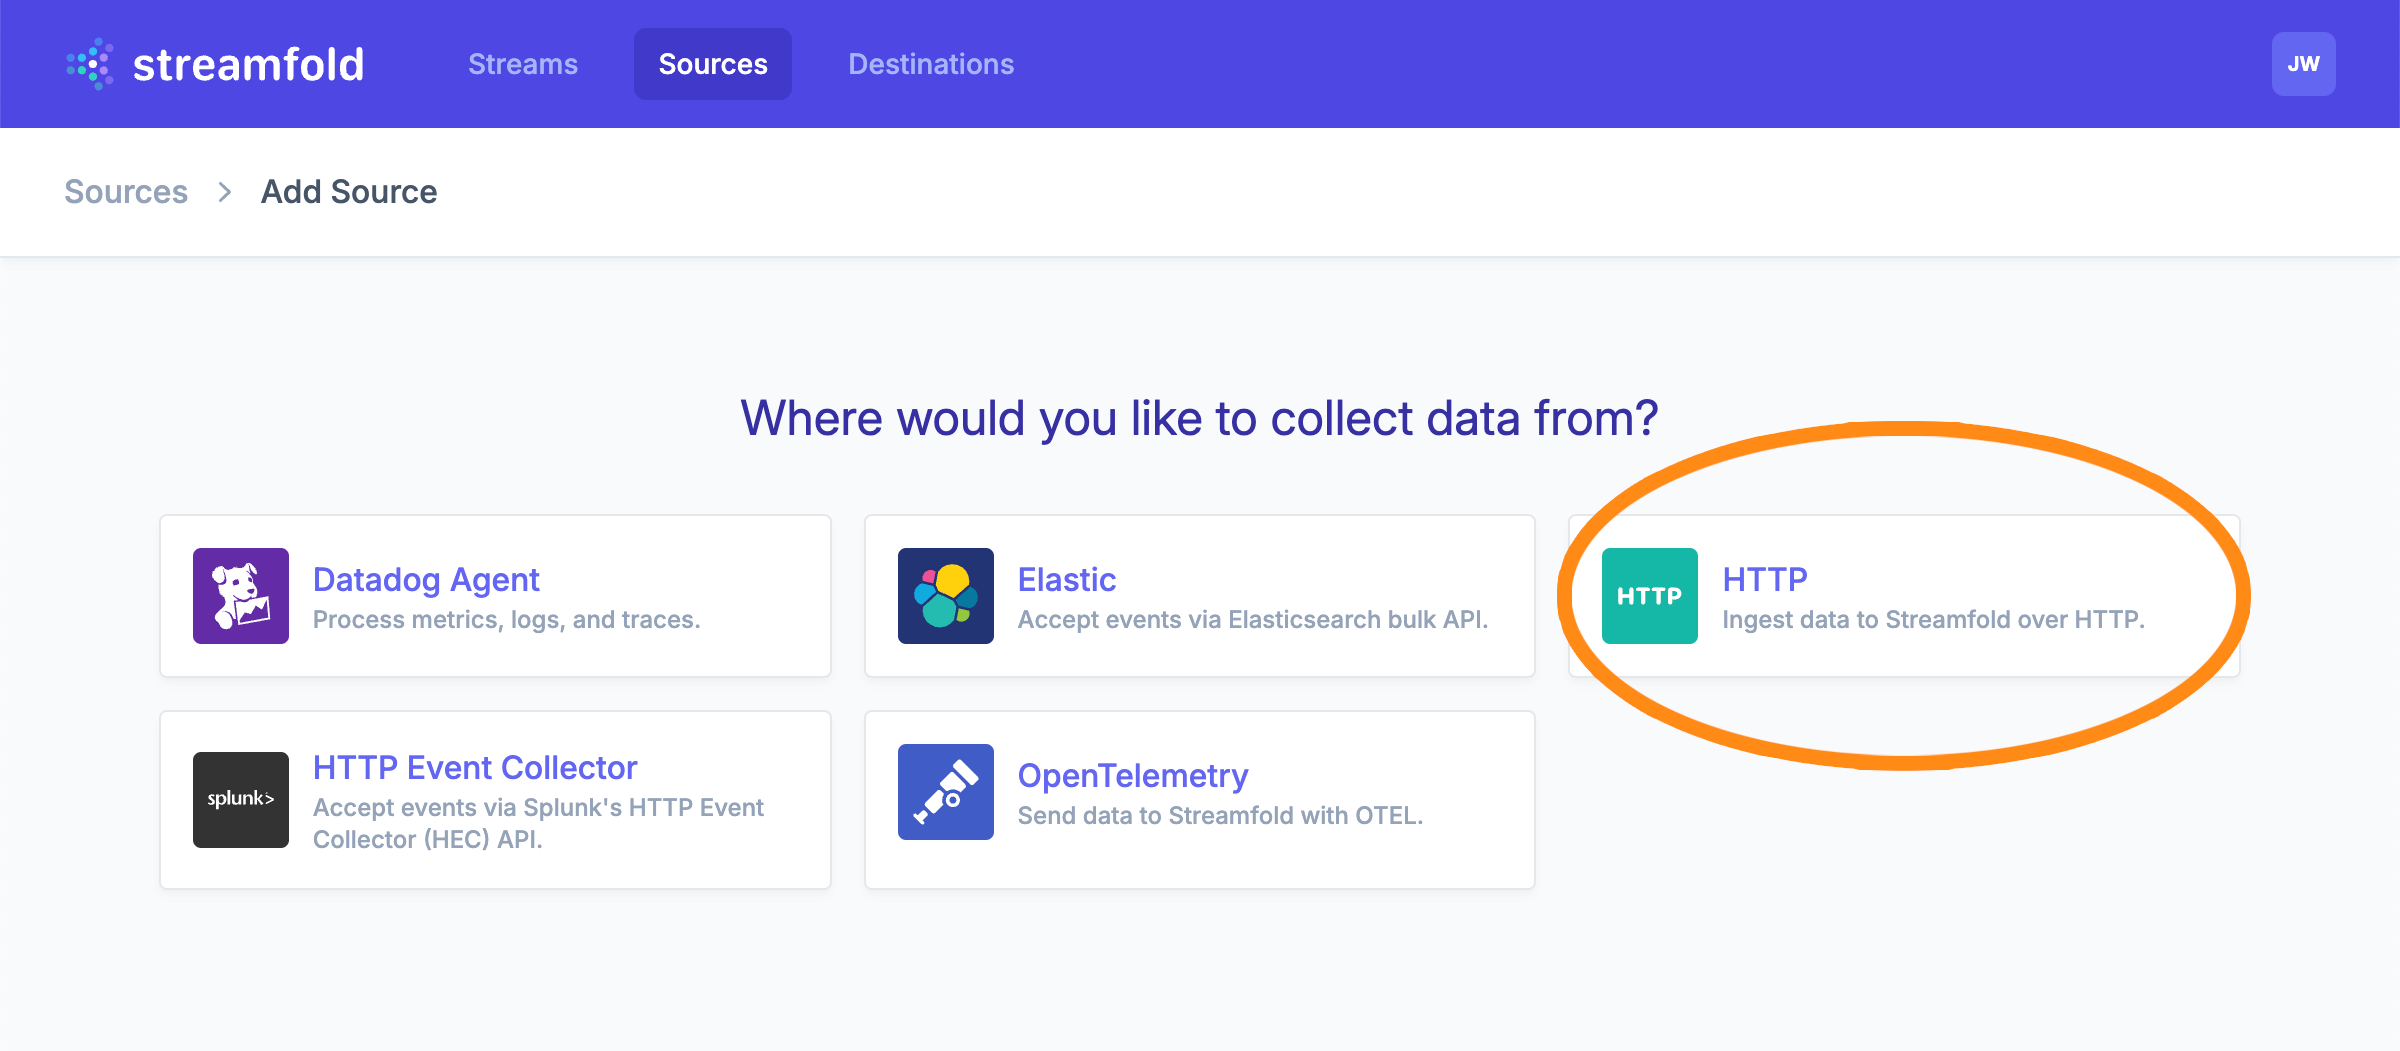
Add a source
Head to the Sources > Add Source page and click on the HTTP source. This source accepts JSON data posted over an HTTP request, making it easy to send data to Streamfold.
Enter a name for your source and record the value listed in the Password field on the HTTP add source page. This is your Streamfold ingress token that we will use this to authenticate to Streamfold. Click Save when done to add the source.
Verifying connectivity
Pull up the page for the HTTP source you just created. Run the following curl command from a terminal, replacing $PASSWORD with the value you copied from the last step.
$ curl -X POST \
  -u streamfold:$PASSWORD \
  -H 'Content-Type: application/json' \
  -d '{"example": {"name": "my first source", "volume": 11}}' \
  https://ingress.streamfold.com/streamfold/http
You can run this command multiple times and it should not report any errors. On the HTTP source page, you should see within 10 seconds some activity on the live metrics. Because you've only sent a few requests the values will be quite low, but they confirm that data is arriving.
Sampling events
Navigate to your new HTTP source and click the Sample Events button at the top. Click Start Sampling and run the curl command from before a few times. You should soon see events that match the payload above.
What is `_meta`?
There will be some meta data attached to the events in addition to the message payload you sent. This meta data includes additional information about the incoming request. It is shown in the top-level field _meta when sampling events.
Within Streamfold you can sample events at different points: from the source, entering/exiting a stream, and when delivered to a destination. When you click Start Sampling, Streamfold will sample the event streams at a constant rate to grab a representative set of events.
Add a destination
Head to the Destinations > Add Destination page and click the HTTP destination. For this guide we will use webhook testing site Webhook.site, but you can use any site that accepts HTTP POSTs. Head to webhook.site and click the "Unique URL" it presents. Keep this site open in a tab that you can refer back to.
Back in Streamfold, give your new HTTP destination a name and paste the URL from Webhook.site into the URL box. Leave all other options as their defaults and click Add Destination.
Build a stream
Head to the Streams > Add Stream page, pick a name for your stream, select the source and destination you created before, and click Add Stream. You will now be on the stream configuration page for your new stream.
Streams are inactive when they are created. This allows you to configure stream filters or stream functions on your stream before you mark it active. Once the stream is enabled it will be deployed live within 10 seconds. You mark the stream active by enabling the toggle Write to Destination at the top. Do that now to enable your stream.
Once you've enabled your stream, run the curl command again from before. This time when you send the event it will travel through the stream and be delivered to the destination. Head back over to the tab you have open to Webhook.site. Within 30 seconds you should see your request pop up.
Why did I have to wait 30 seconds?
Streamfold is built for efficiently processing high-volumes of data. For destinations that means we batch multiple events into a single outgoing request to reduce the overhead of sending many small requests. The HTTP destination waits up to 30 seconds before flushing a batch to catch any subsequent events. Try running multiple curl requests in sequence to see how the payload changes in Webhook.site.
Adding a stream filter
Each stream has a filter that selects the specific events you want processed on the stream. This allows you to create separate streams and destinations for different incoming data types. The filters execute a matcher on each incoming event.
On your stream, click the box labeled Set Filter. This will expand the stream filter box where you can enter multiple match conditions. You can also set an optional label to describe the filter. For this test we will filter messages where the volume in the example object is set to 11. Select the field using JSONPath notation with the string example.volume and set the value to 11 like so:
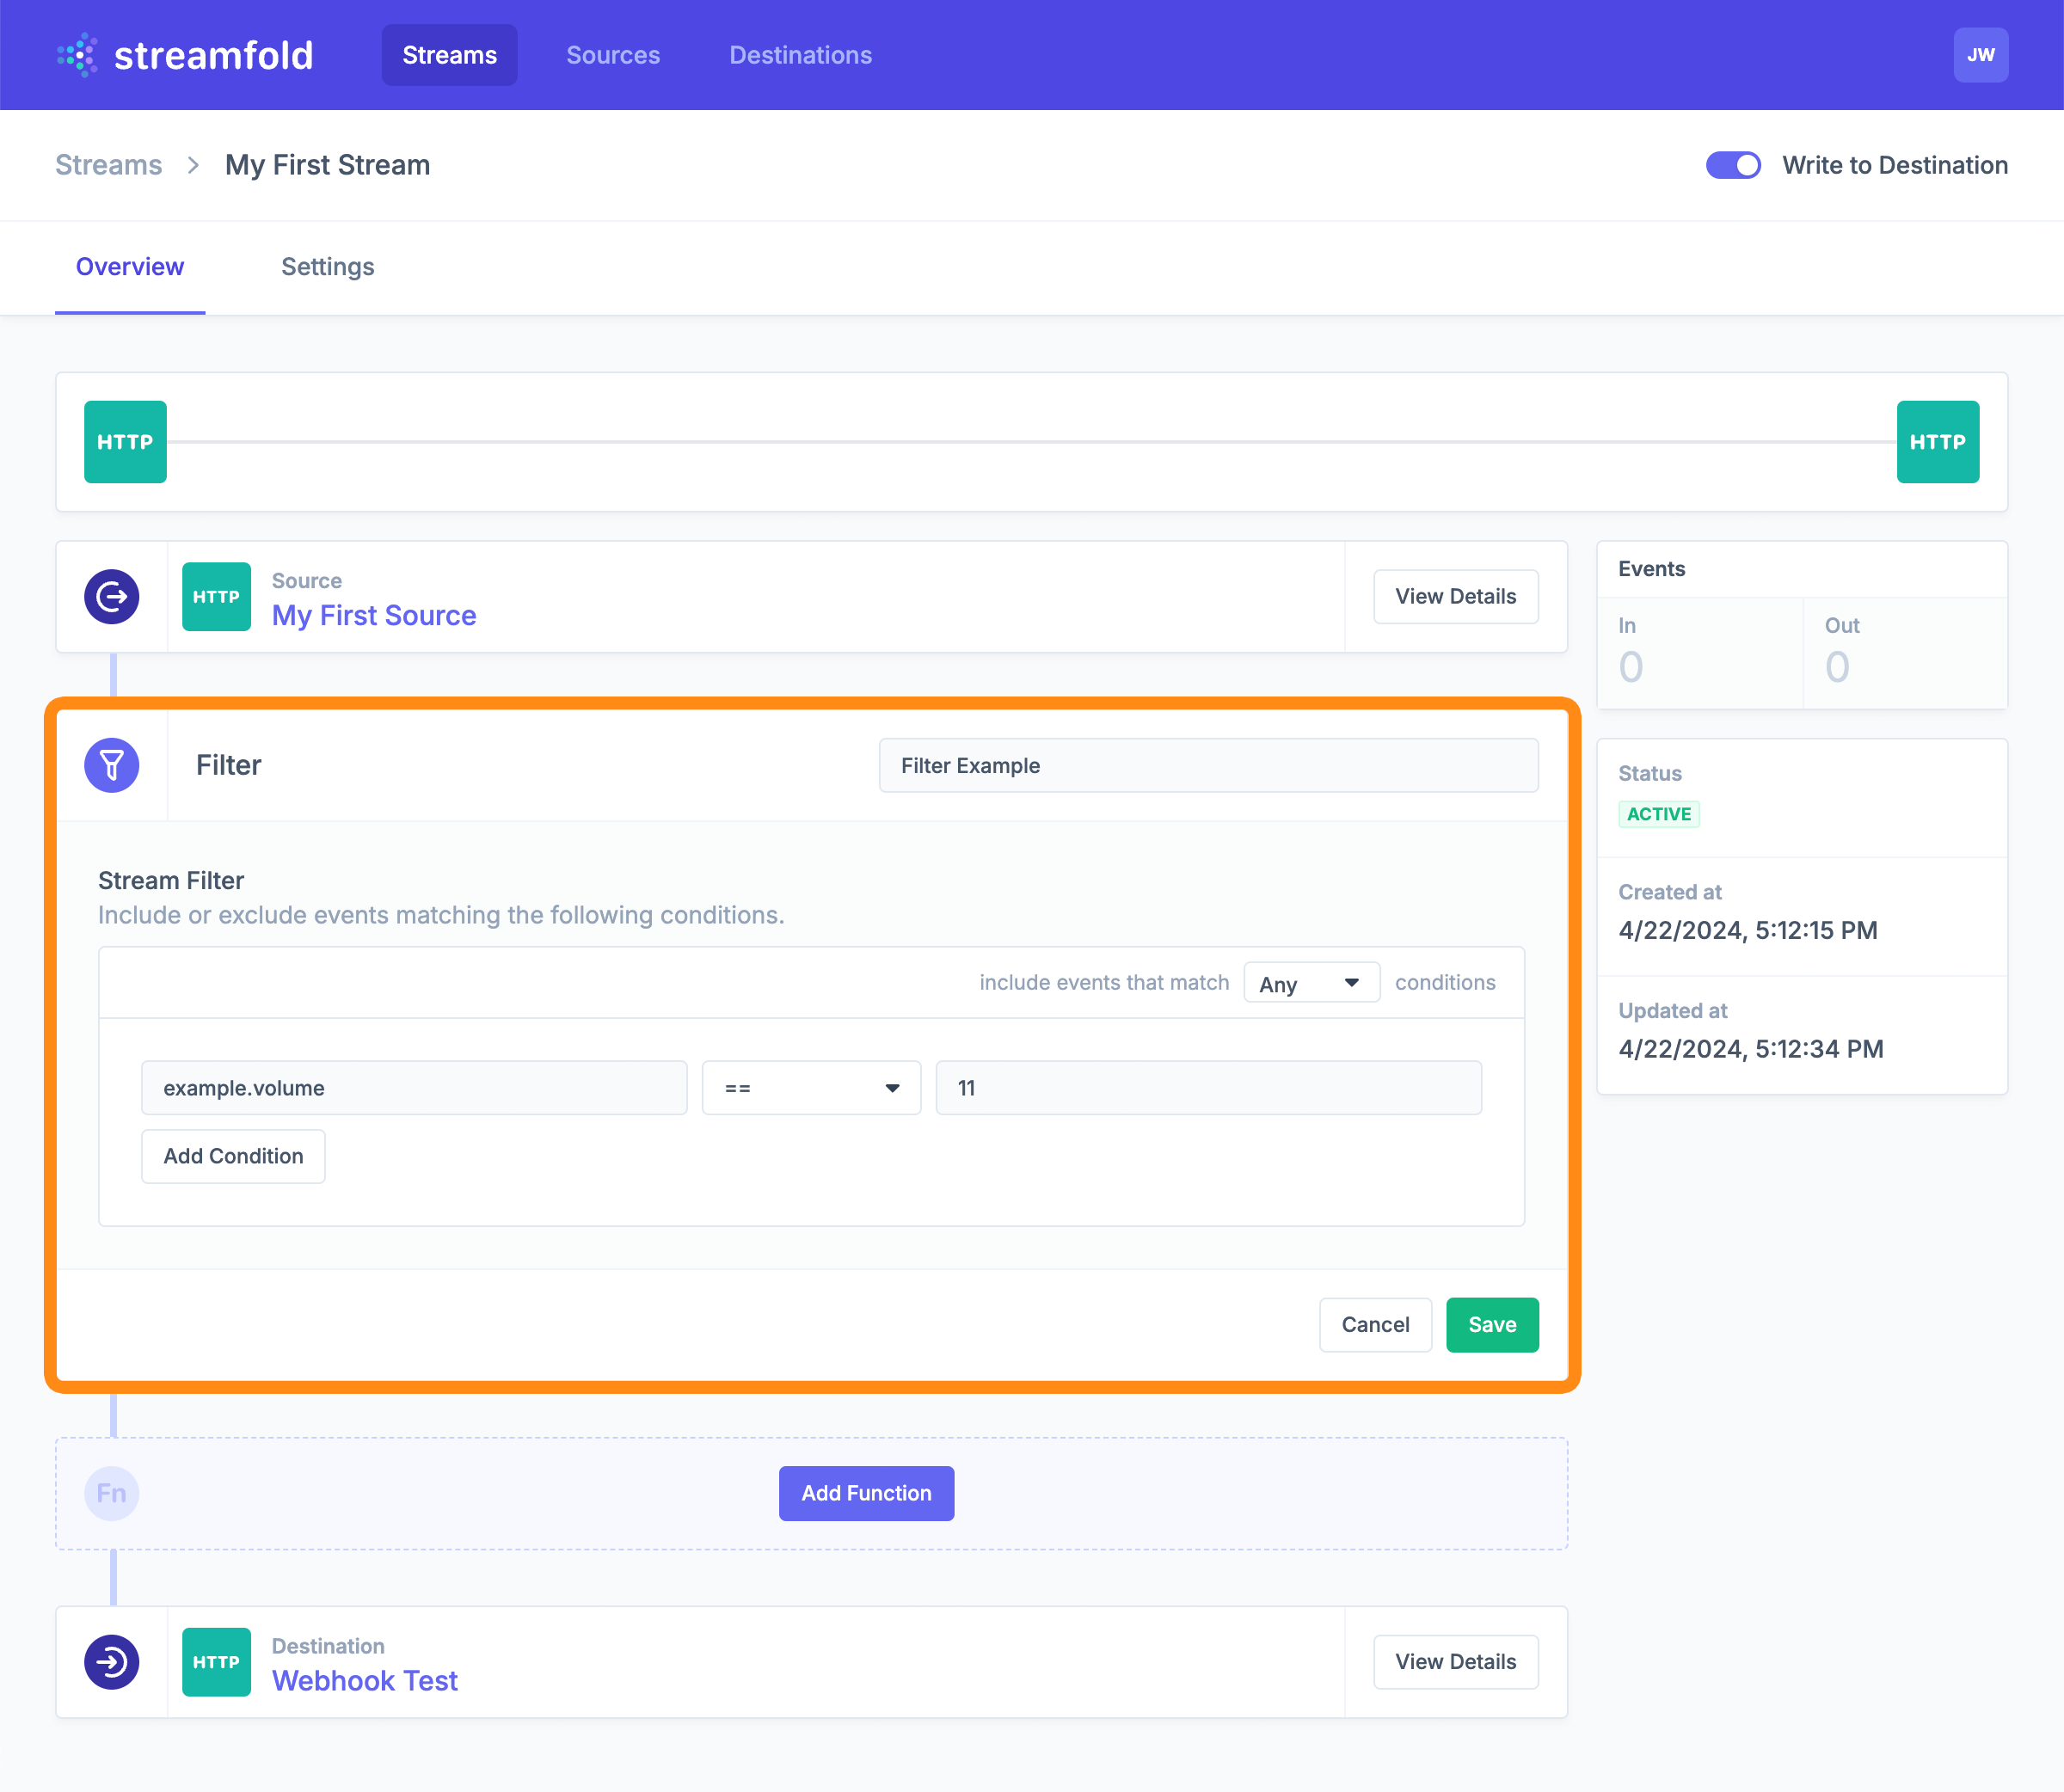
Click Save on the filter and the change will be immediately deployed.
If you re-run your original curl command you will notice that those events still end up at the destination. However, if you run the following curl command you should not see any events get through:
$ curl -X POST \
  -u streamfold:$PASSWORD \
  -H 'Content-Type: application/json' \
  -d '{"example": {"name": "my first source", "volume": 9}}' \
  https://ingress.streamfold.com/streamfold/http
Can I use filters elsewhere?
Filters are a general concept in Streamfold that can be used in several places. Filters are explained in more detail on the streams page.
Transforming data with a function
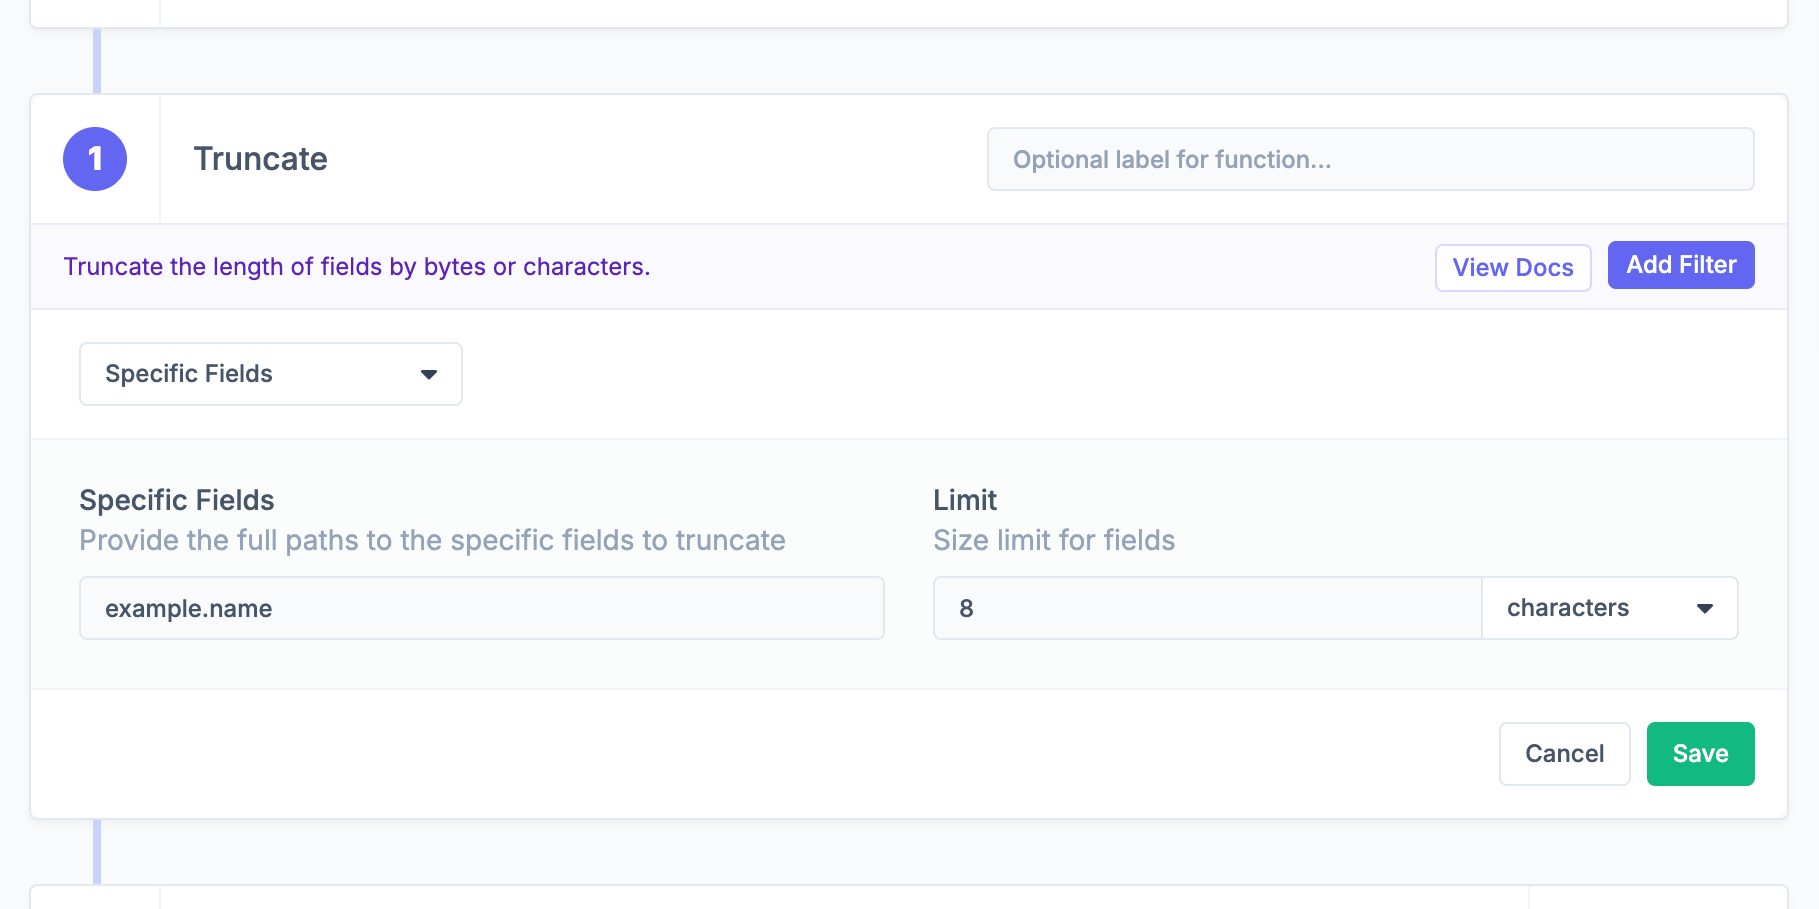
For the last step of this guide we will add a stream function that operates on the event data. We will truncate the name field of the message.
Click Add Function on the stream and select Truncate from the drop down. For the Specific Fields, enter the selector for our name field example.name and set a size limit of 8. Make sure to switch from bytes to characters. Click Save, the updated stream will be deployed immediately.
Run the curl command again. This time when the event arrives the name field will have been truncated to just "my first".
Next steps
Congratulations on configuring your first end-to-end Streamfold stream! You are on your way to fully controlling your telemetry data.
Here are some next step guides for how to advance your Streamfold usage. Also take a look at the remaining docs here.