Guides
Querying Datadog logs with Clickhouse Cloud
Streamfold makes it easy to build your own telemetry data lake. In the previous guide Datadog Logs to S3 we learned how to decouple our Datadog Agent Log data and route it to S3 with Streamfold. In this guide we'll go a step further and query that data using Clickhouse Cloud.
This is a quickstart guide for connecting Clickhouse Cloud to your Datadog Logs telemetry lake you built with Streamfold. In this guide you'll connect Clickhouse Cloud to your S3 bucket that contains your full fidelity logs and query them to gain additional insights.
Got a telemetry data lake?
You'll need to have an S3 bucket populated with your full fidelity logs that you decoupled from the Datadog agent with Streamfold. If you haven't done that yet, complete the Datadog Logs to S3 guide first.
Create a Clickhouse Cloud Trial Account
If you don't have a Clickhouse Cloud account you'll need to register for one here.
Create a Clickhouse Cloud Service
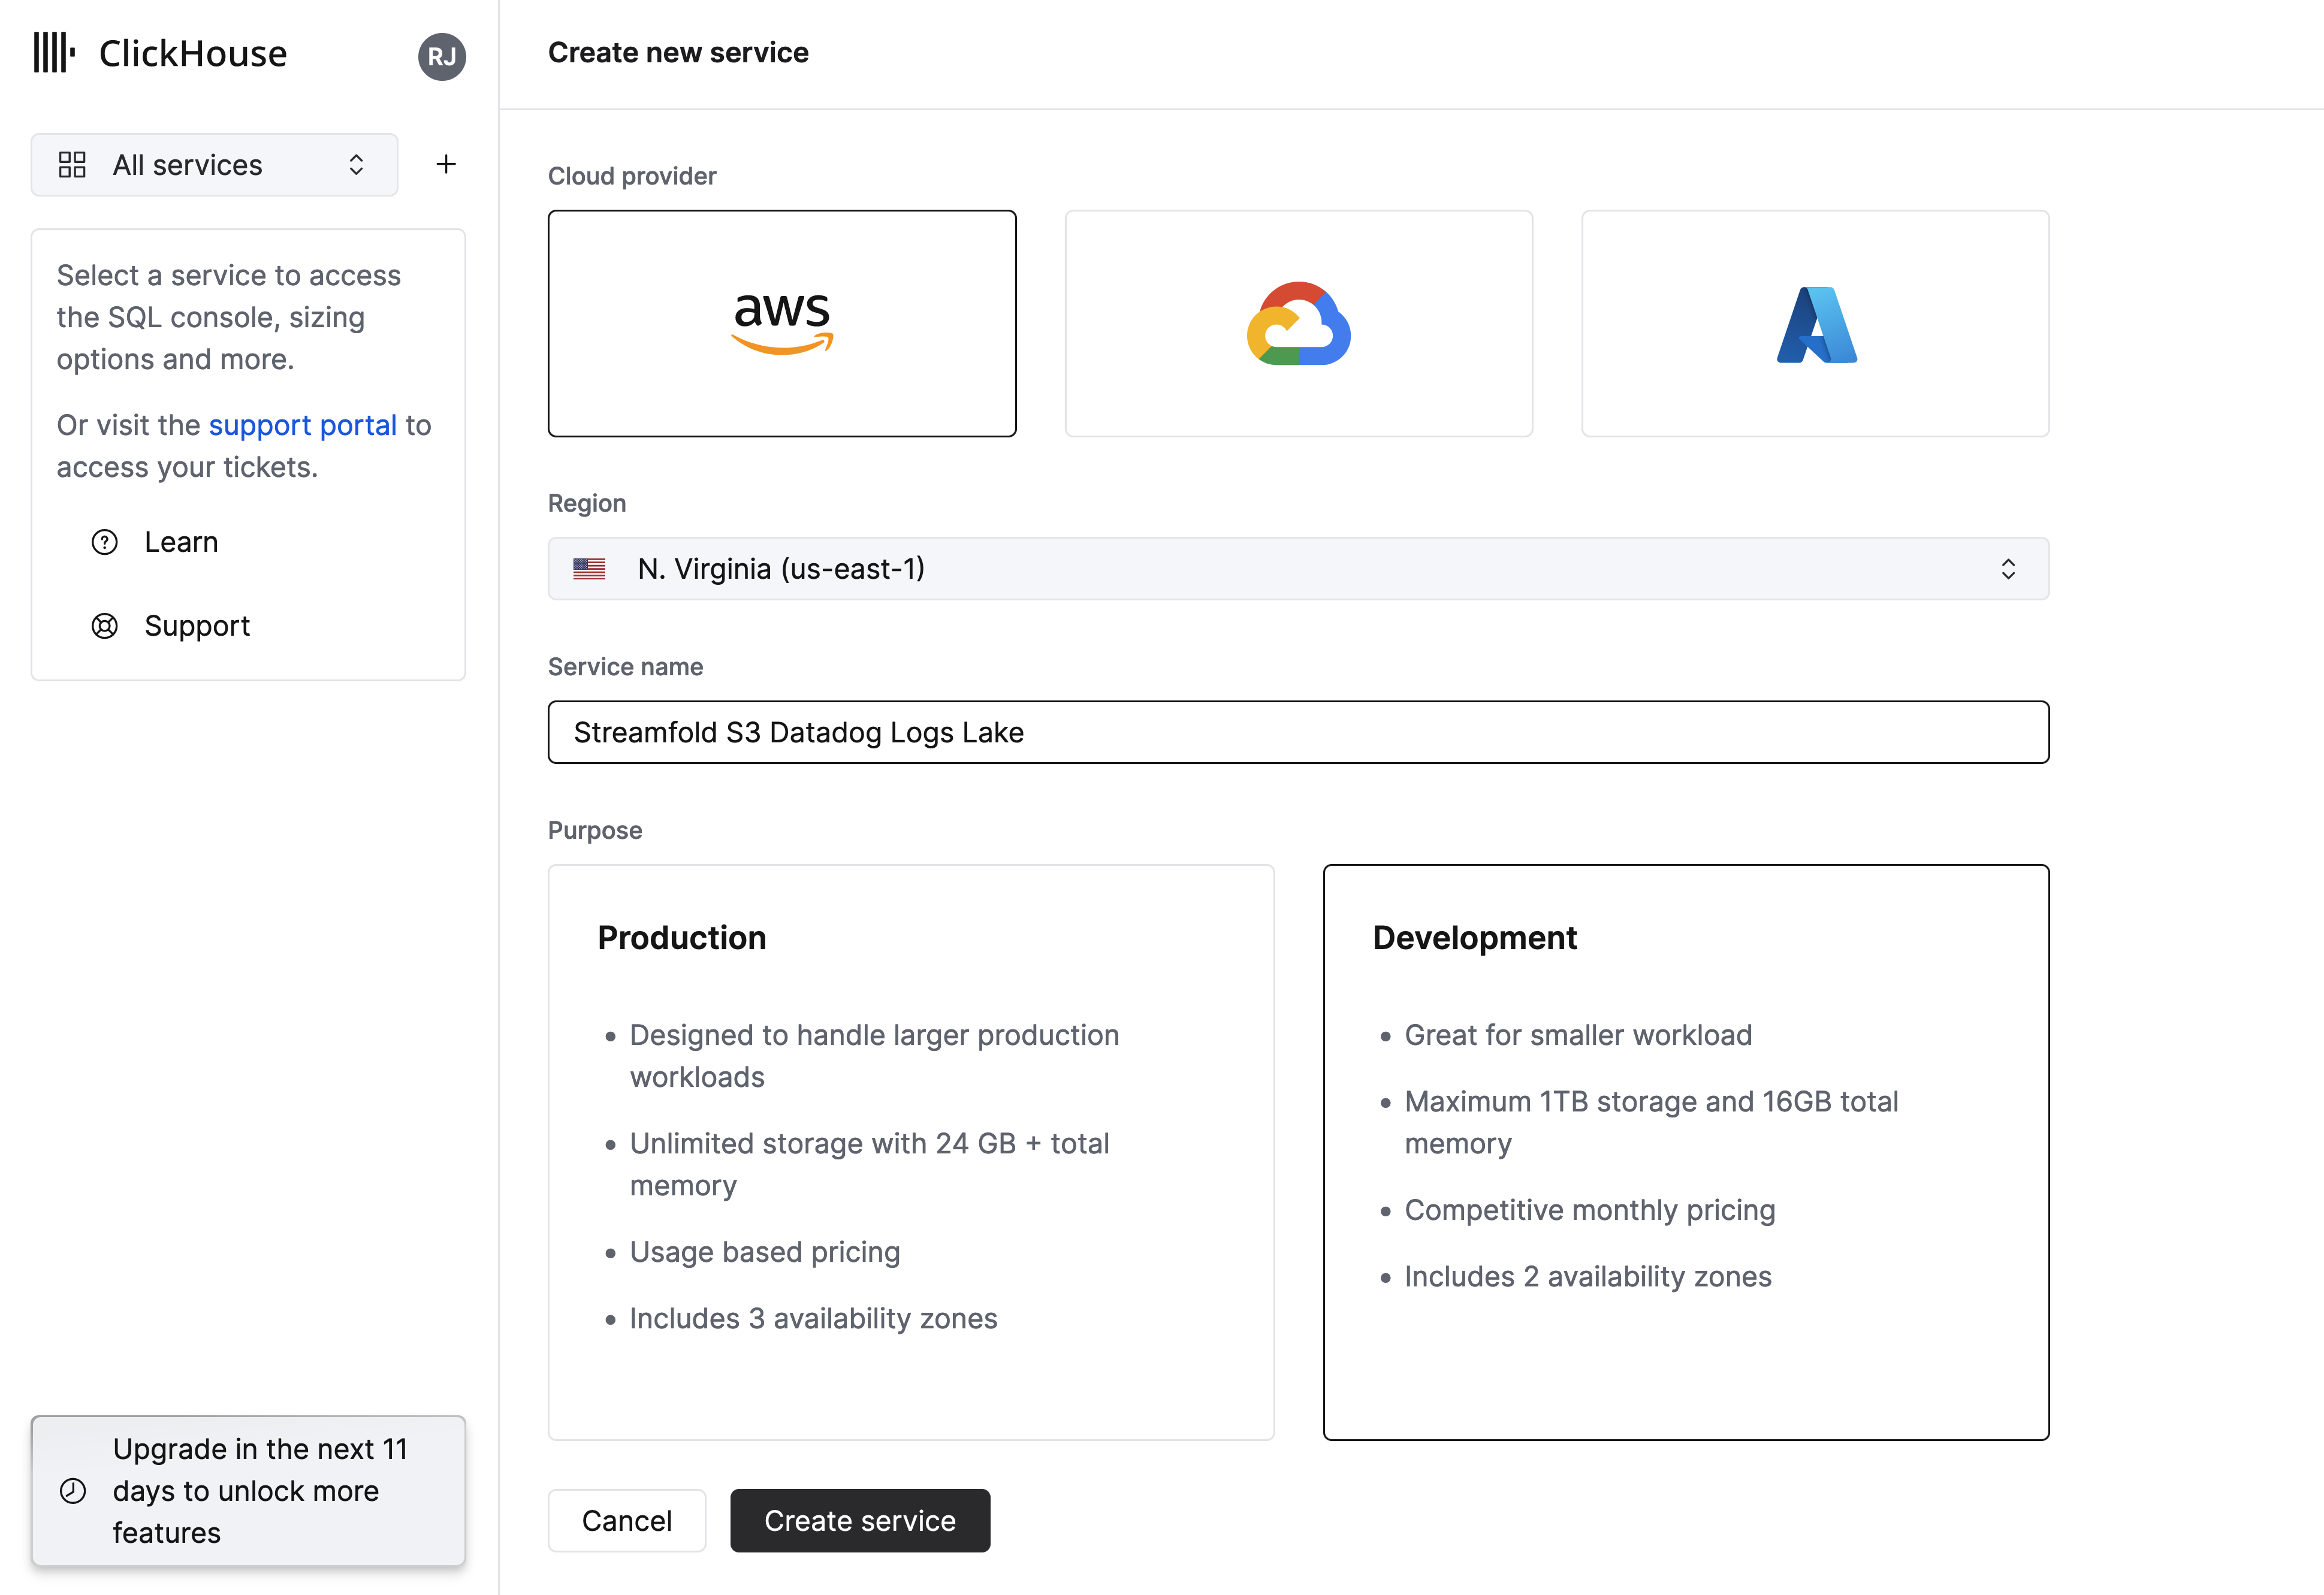
Once you've created your account log in and you'll be prompted to create your first service.

- Select AWS as your cloud provider and select a region.
- Give your service a name, in this guide we'll use the name
Streamfold S3 Datadog Logs Lake - Select
Developmentfor purpose and clickCreate Service
Connect your Clickhouse Cloud Service to your S3 Bucket
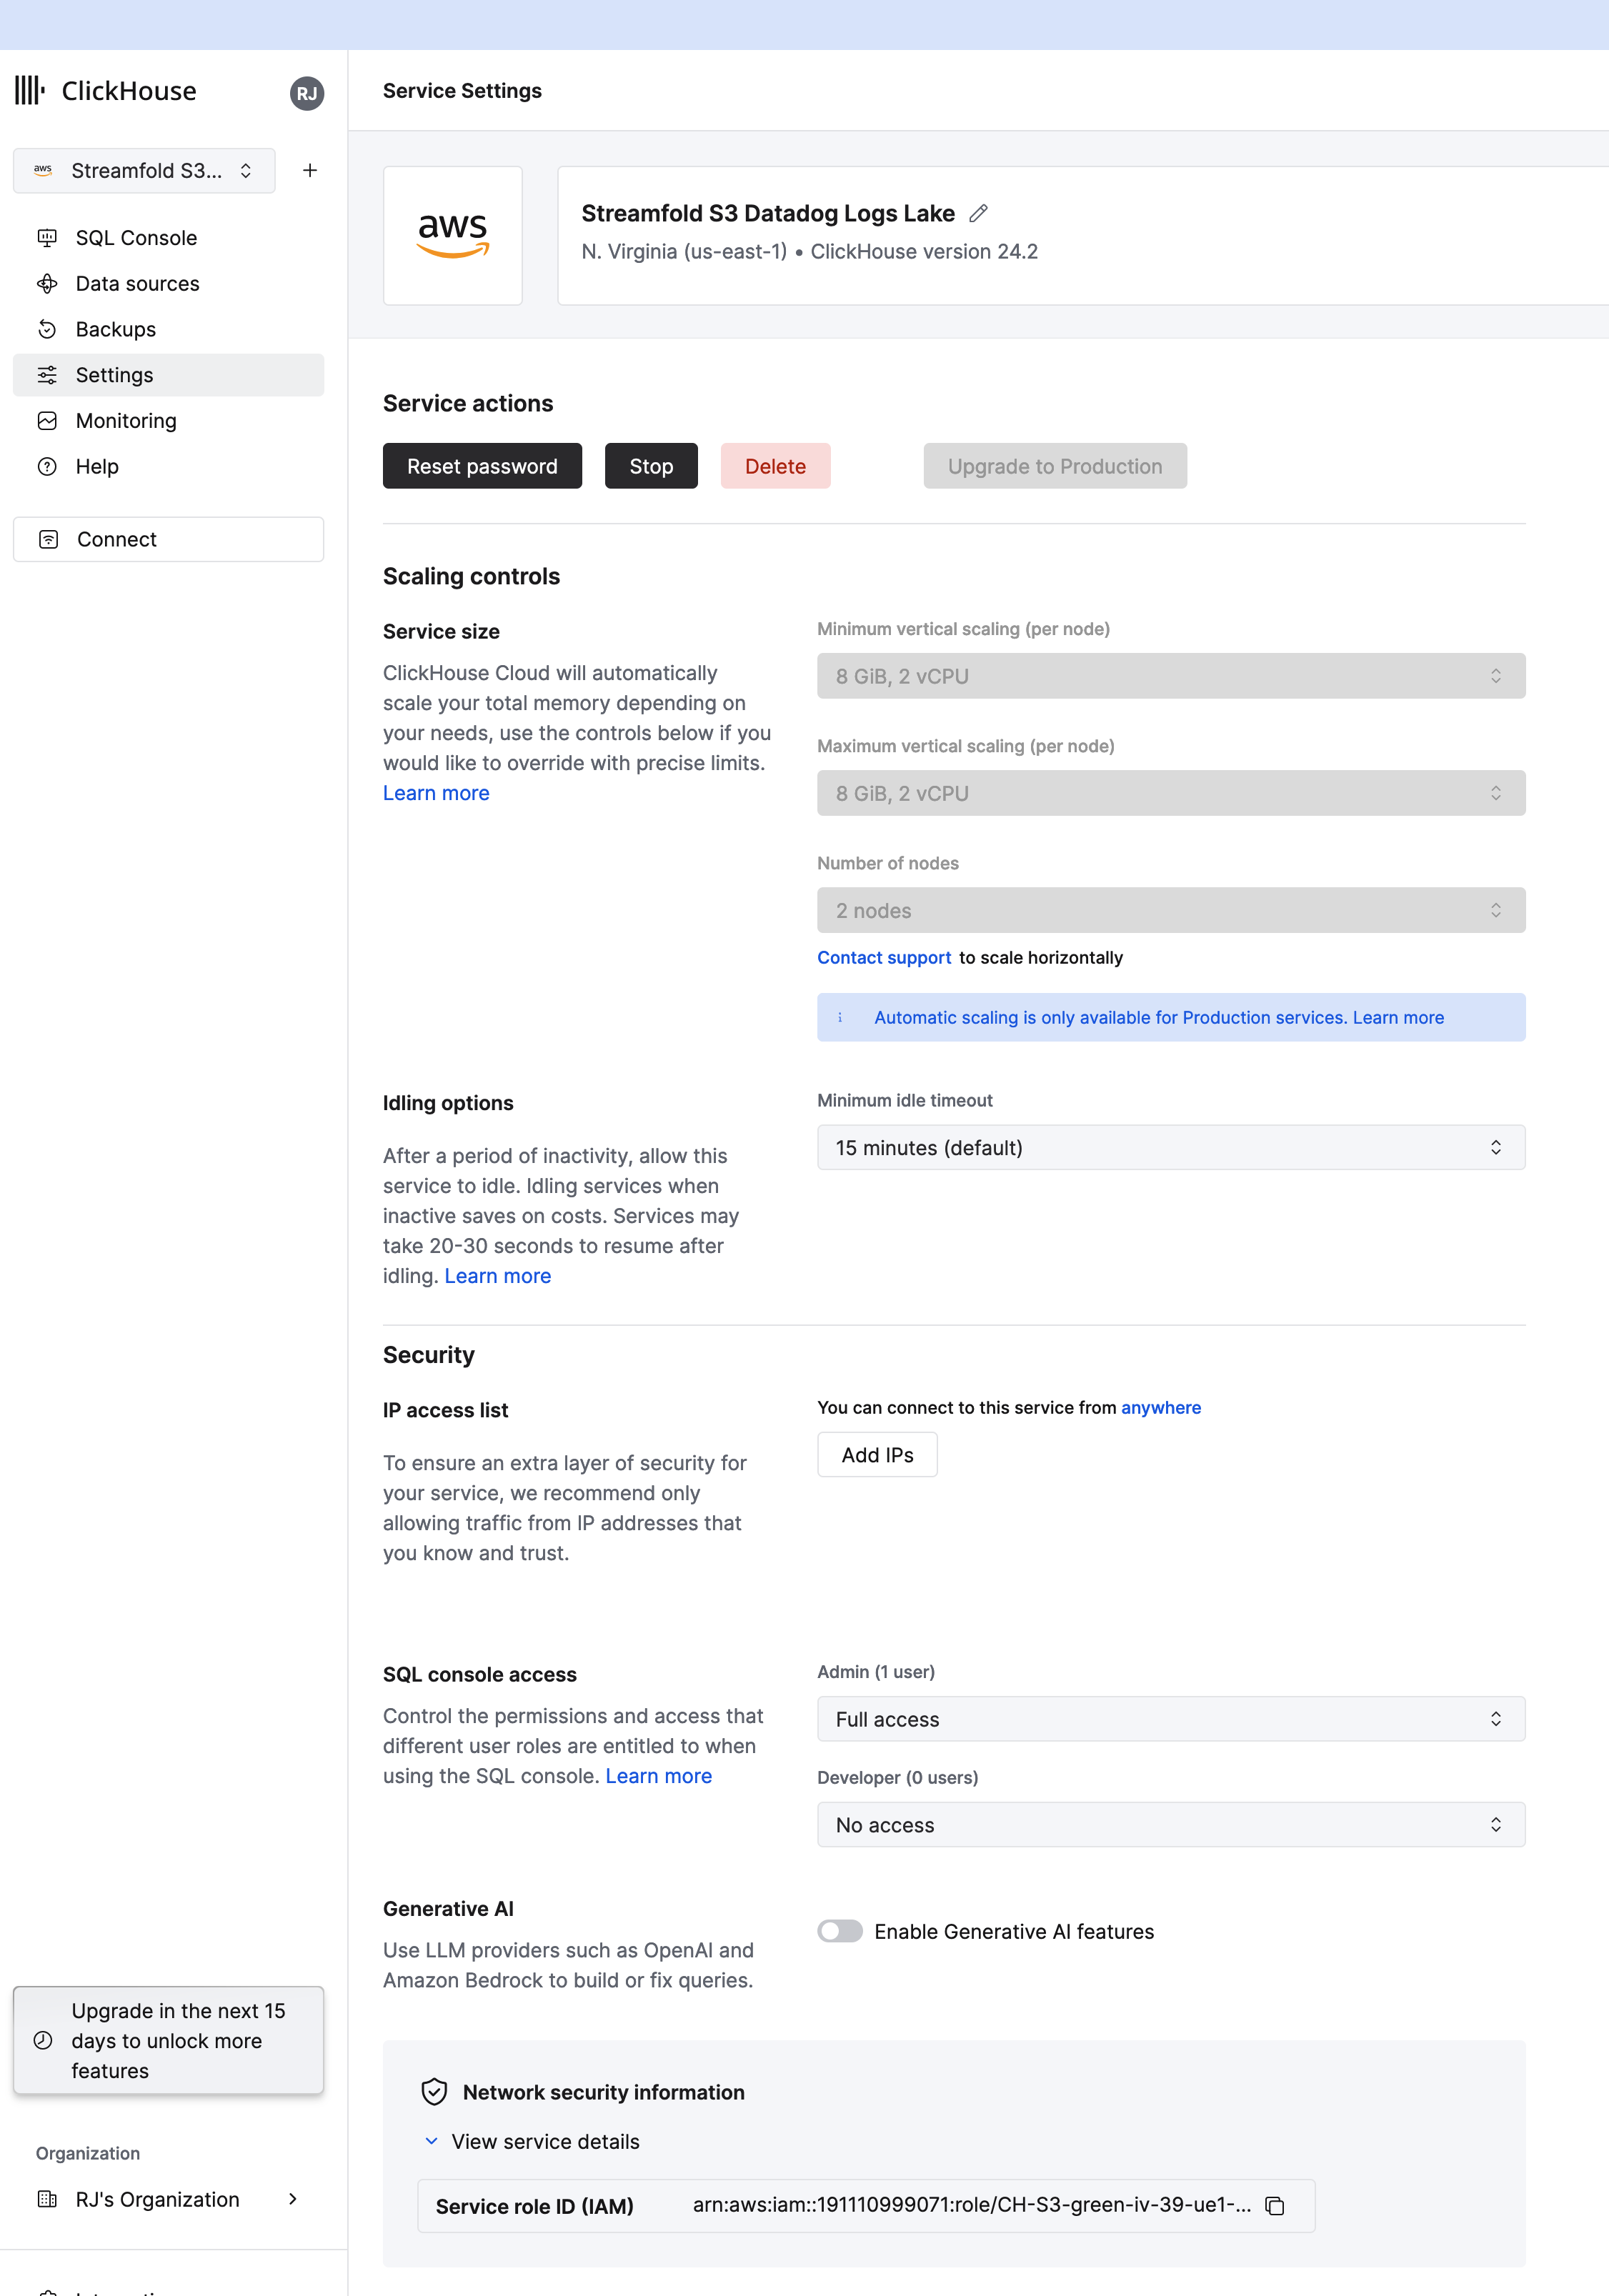
Next you'll need to create an IAM Policy and Role to allow your Clickhouse Cloud service to access your S3 Bucket. First you'll need to get the IAM ARN for your service.
- Navigate to the Streamfold S3 Datadog Logs Lake service
- Click Settings, scroll down to the bottom and expand the
Network security information > View service detailsand copy theService role ID (IAM)
Create IAM Policy and Role for Clickhouse
Next we'll need to create an IAM Policy and a Role so your Clickhouse service can access your S3 bucket. Clickhouse provides full instructions on how to create the Role and Policy in the AWS Console here. However for this guide we're going to use Terraform to create the policy and role. Below are Terraform snippets for your convenience.
Role name prefix
Clickhouse requires that the role name begin with the prefix ClickHouseAccessRole-
resource "aws_iam_role" "clickhouse-access" {
  name = "ClickHouseAccessRole-001"
  assume_role_policy = jsonencode({
    Version = "2012-10-17"
    Statement = [
      {
        Action = "sts:AssumeRole"
        Effect = "Allow"
        "Principal": {
          "AWS": "<paste the Clickhouse service arn here>"
        },
      }
    ]
  })
}

resource "aws_iam_role_policy" "clickhouse-access" {
  name   = "clickhouse-access"
  role   = aws_iam_role.clickhouse-access.name
  policy = data.aws_iam_policy_document.clickhouse-access.json
}

data "aws_iam_policy_document" "clickhouse-access" {
  statement {
    effect = "Allow"
    actions = [
      "s3:GetBucketLocation",
      "s3:ListBucket"
    ]
    resources = [
      "arn:aws:s3:::<bucket name>"
    ]
  },
  statement {
    effect = "Allow"
    actions = [
      "s3:Get*",
      "s3:List*"
    ]
    resources = [
      "arn:aws:s3:::<bucket name>/*"
    ]
  }
}
Setup Clickhouse S3 Data source
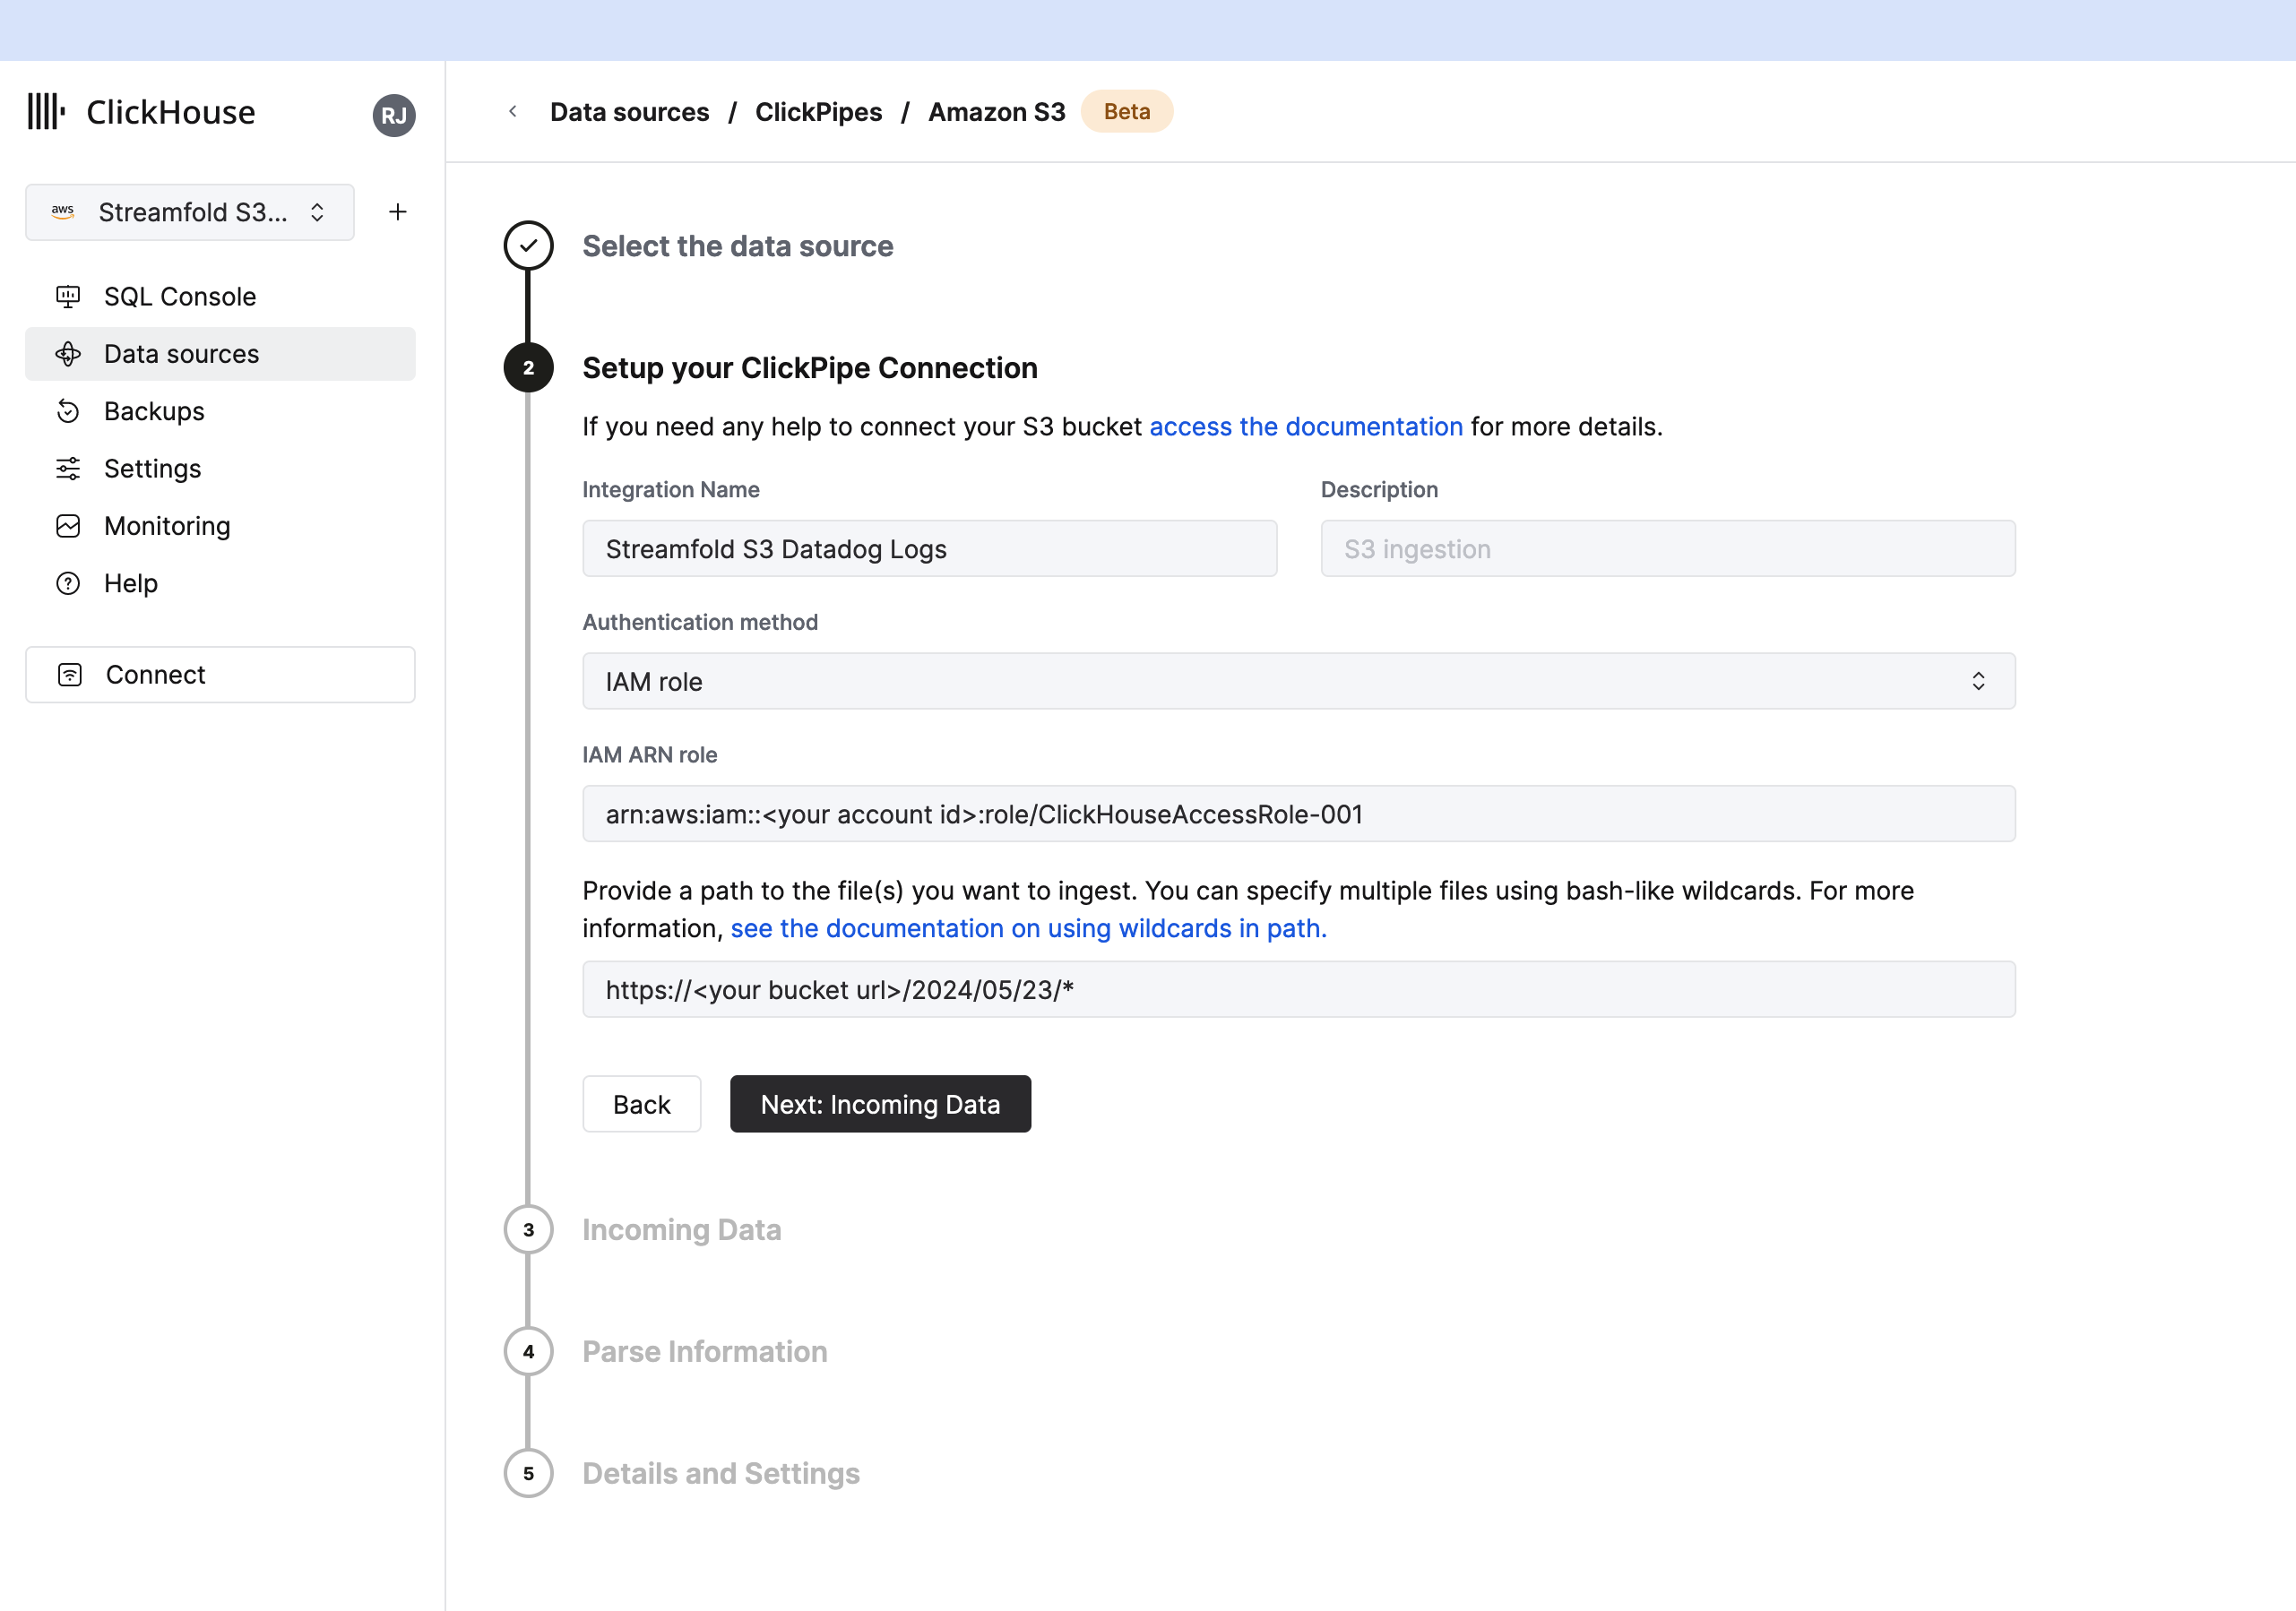
Now back in Clickhouse on your service, click Data sources and setup your S3 Click pipe connection.
- Give your integration a name
Streamfold S3 Datadog Logs - Select
IAM RoleforAuthentication method - Paste the ARN of the role you created above into
IAM ARN role - Provide the path to the files you want to ingest from your bucket. In this example we're ingesting all the logs from the May 23rd 2024. You can use wildcards to ingest as much data as you want. For example if you wanted to ingest all the logs for the month of May your path would be
https://<your bucket url>/2024/05/* - Click
Next: Incoming Data
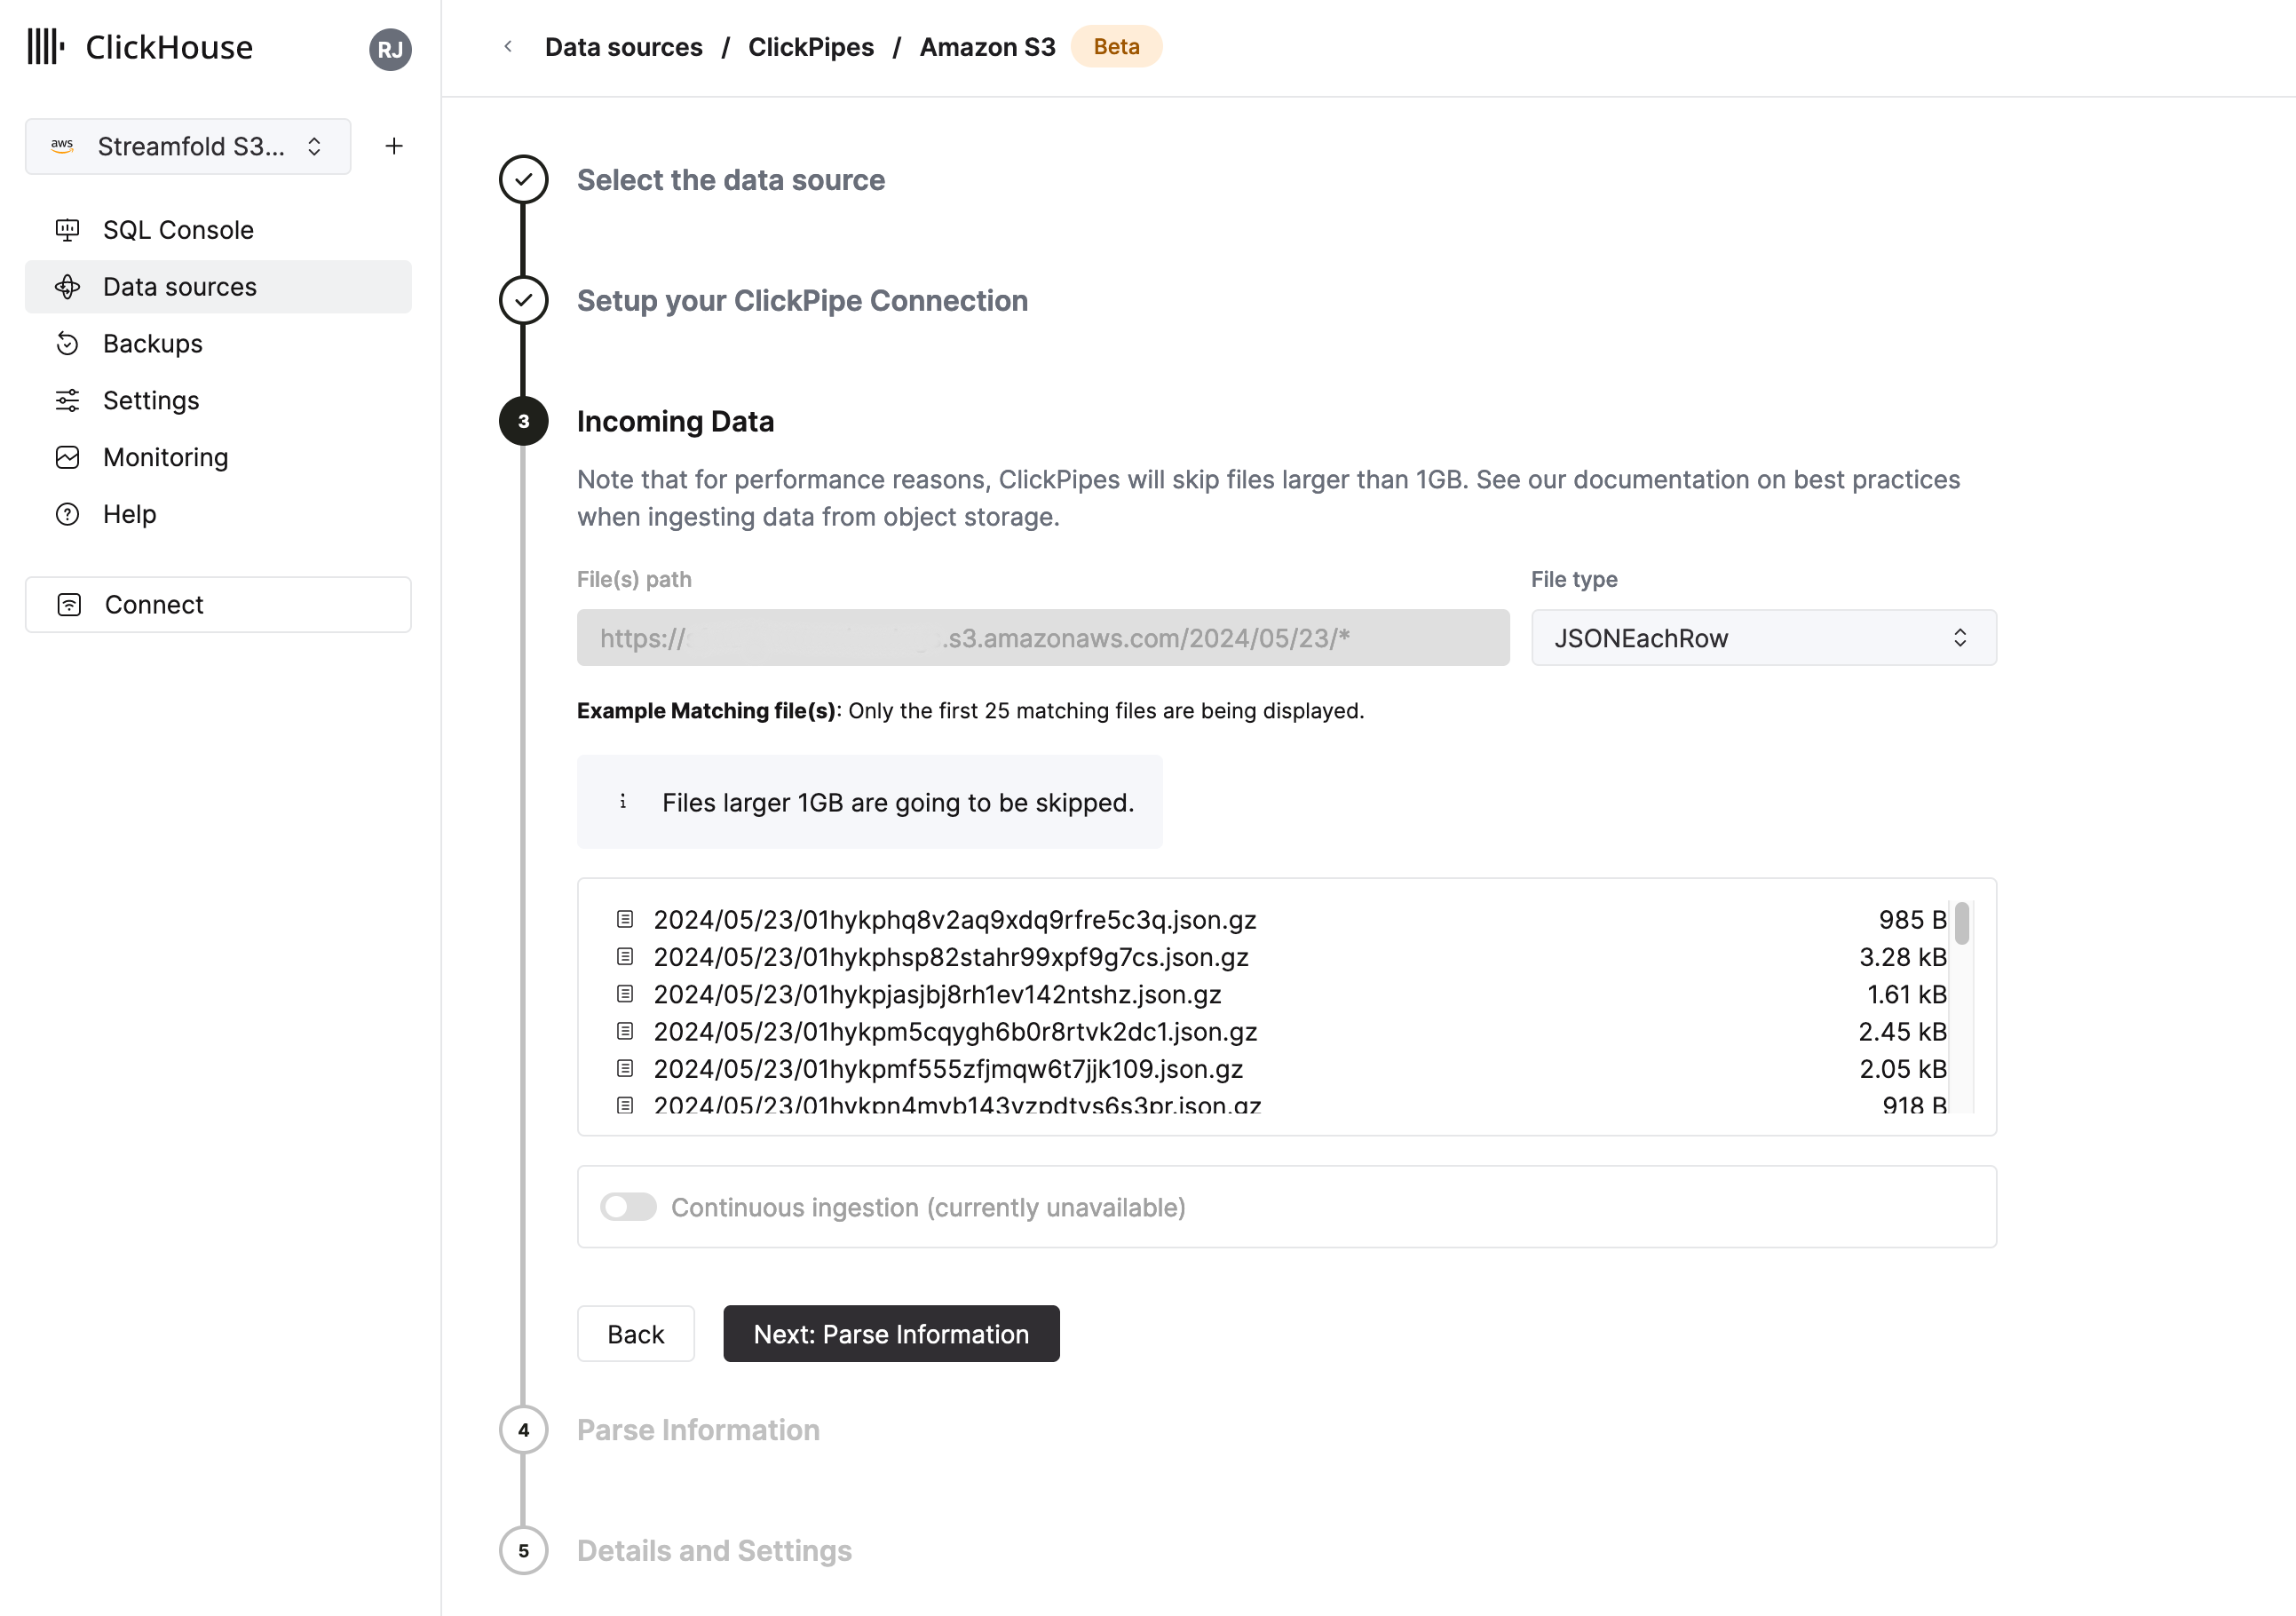
Incoming Data
For File type select JSONEachRow. Then click Next: Parse Information
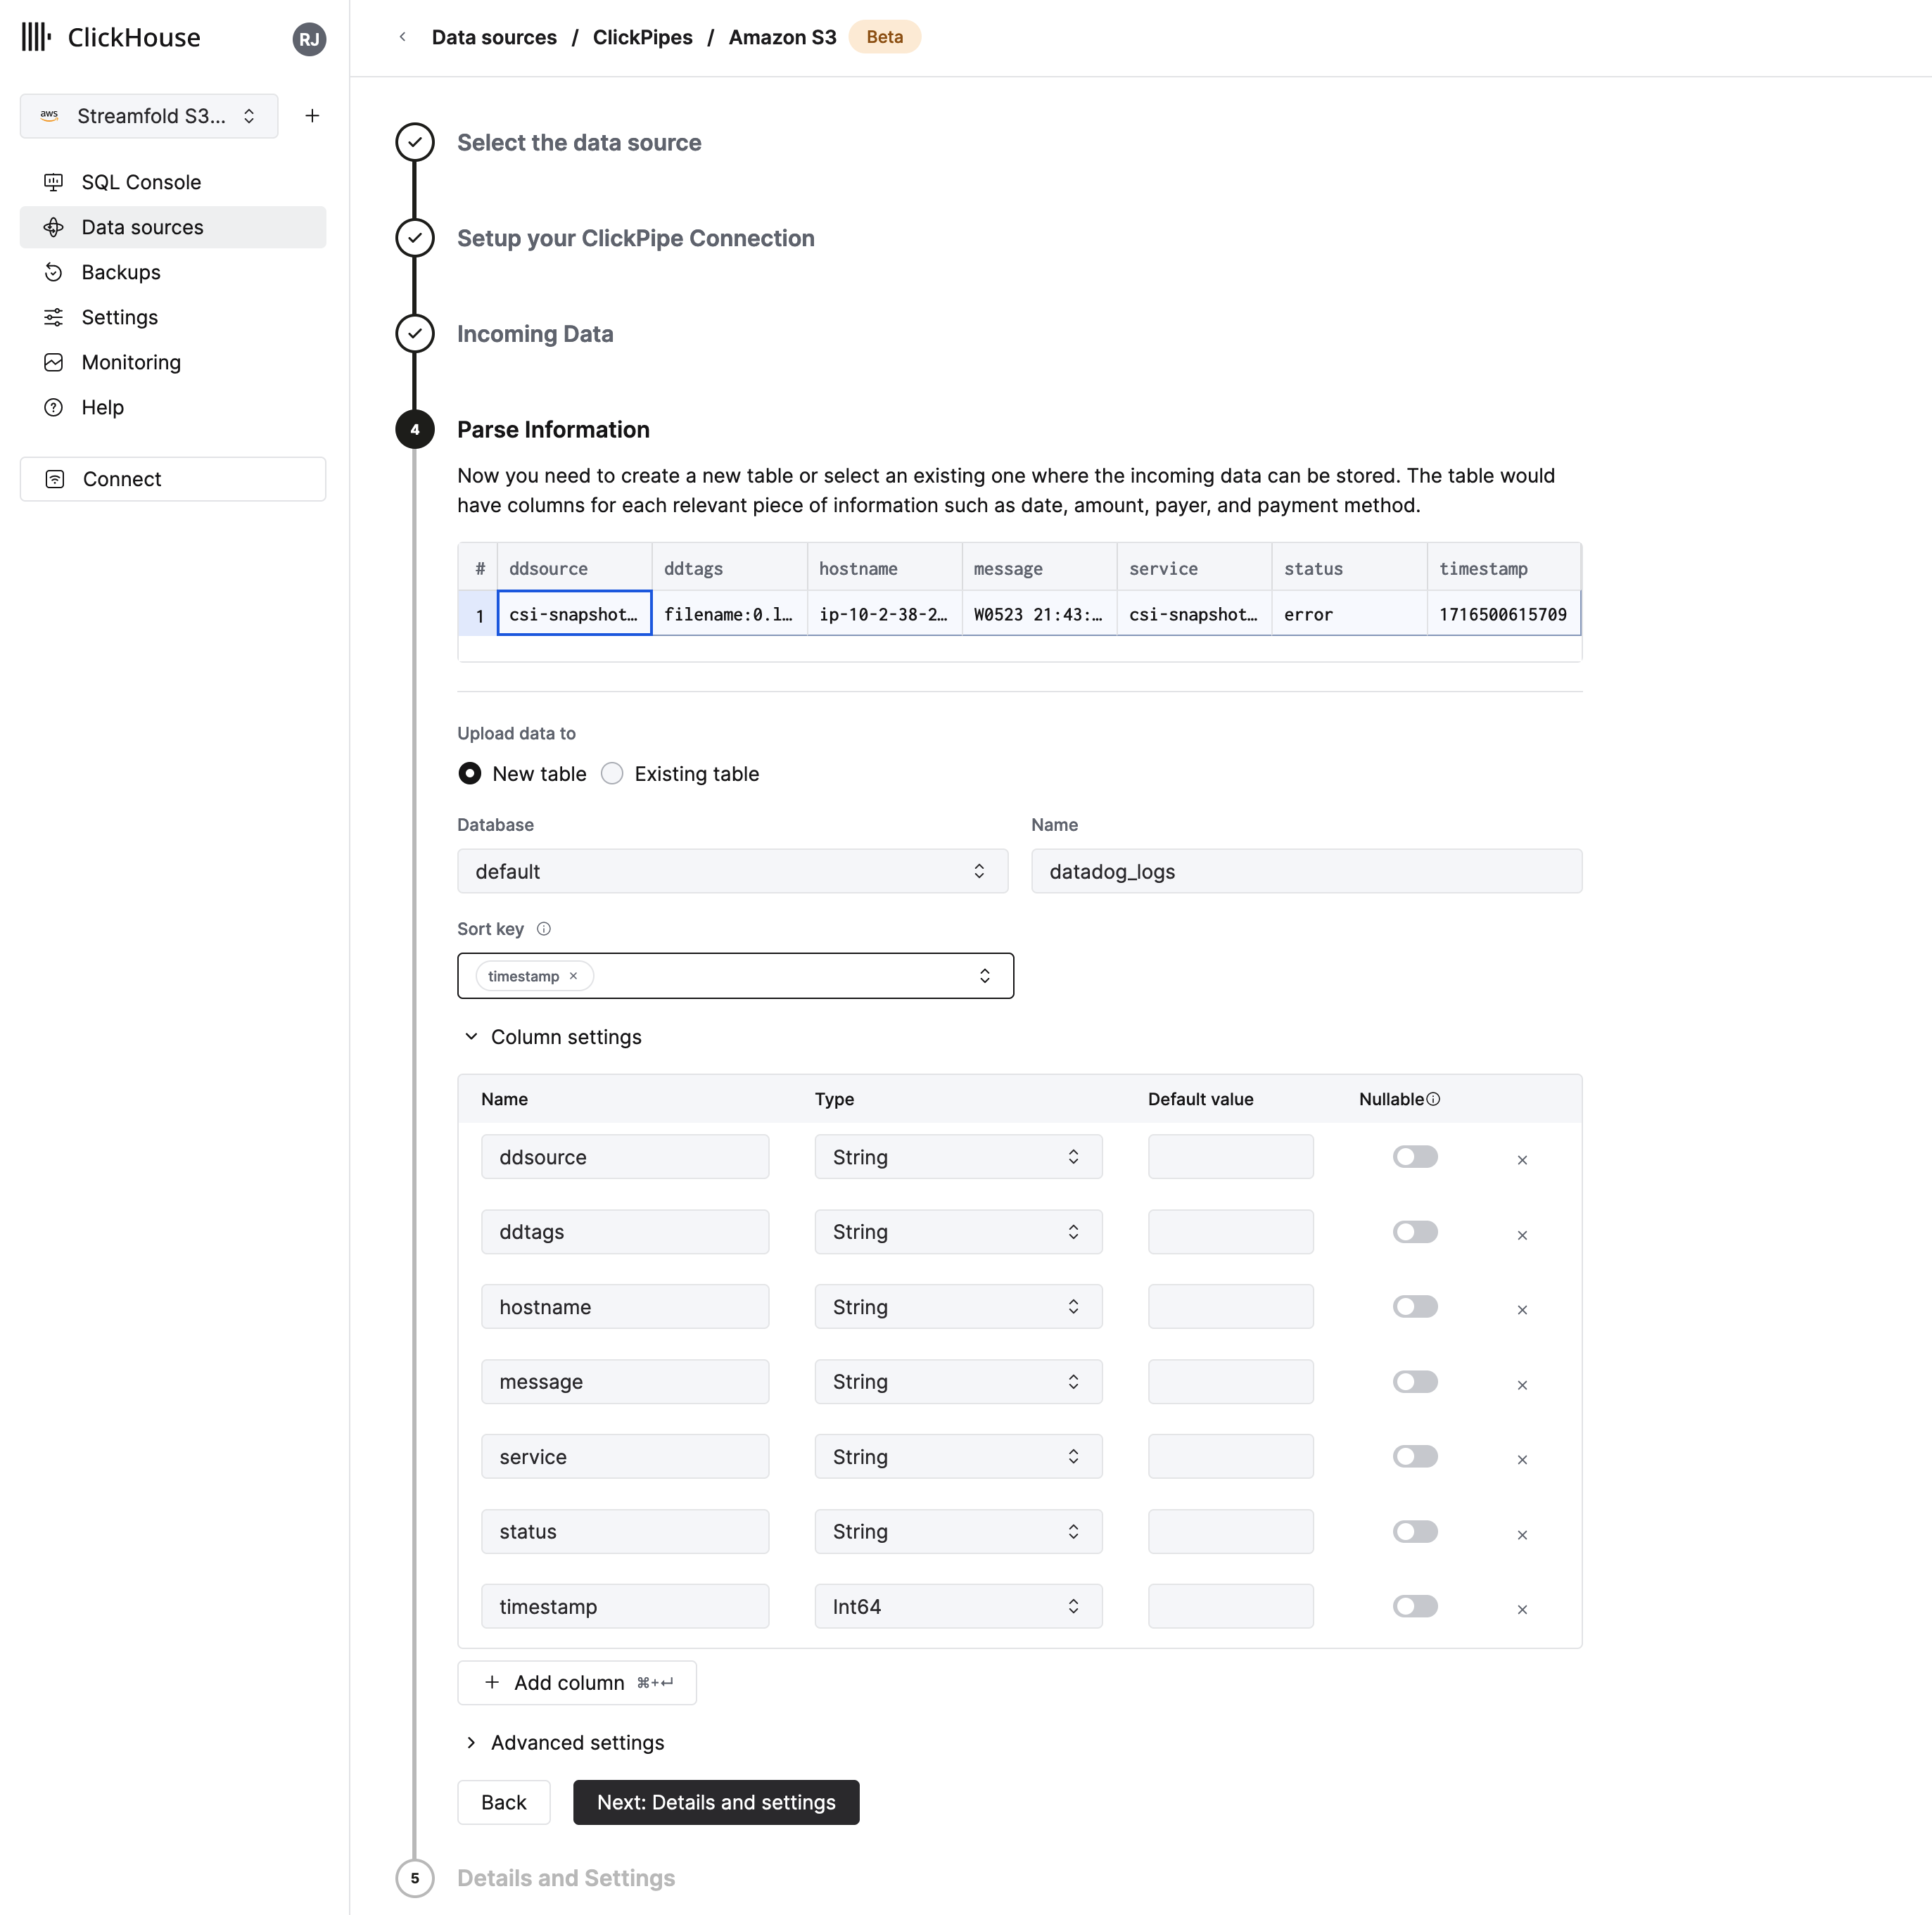
Parse Information
- Select
New tableforUpload data tooption. - Set Database name to
defaultand enterdatadog_logsfor the table name. - Set
Sort keytotimestamp - Then click
Next: Details and Settings
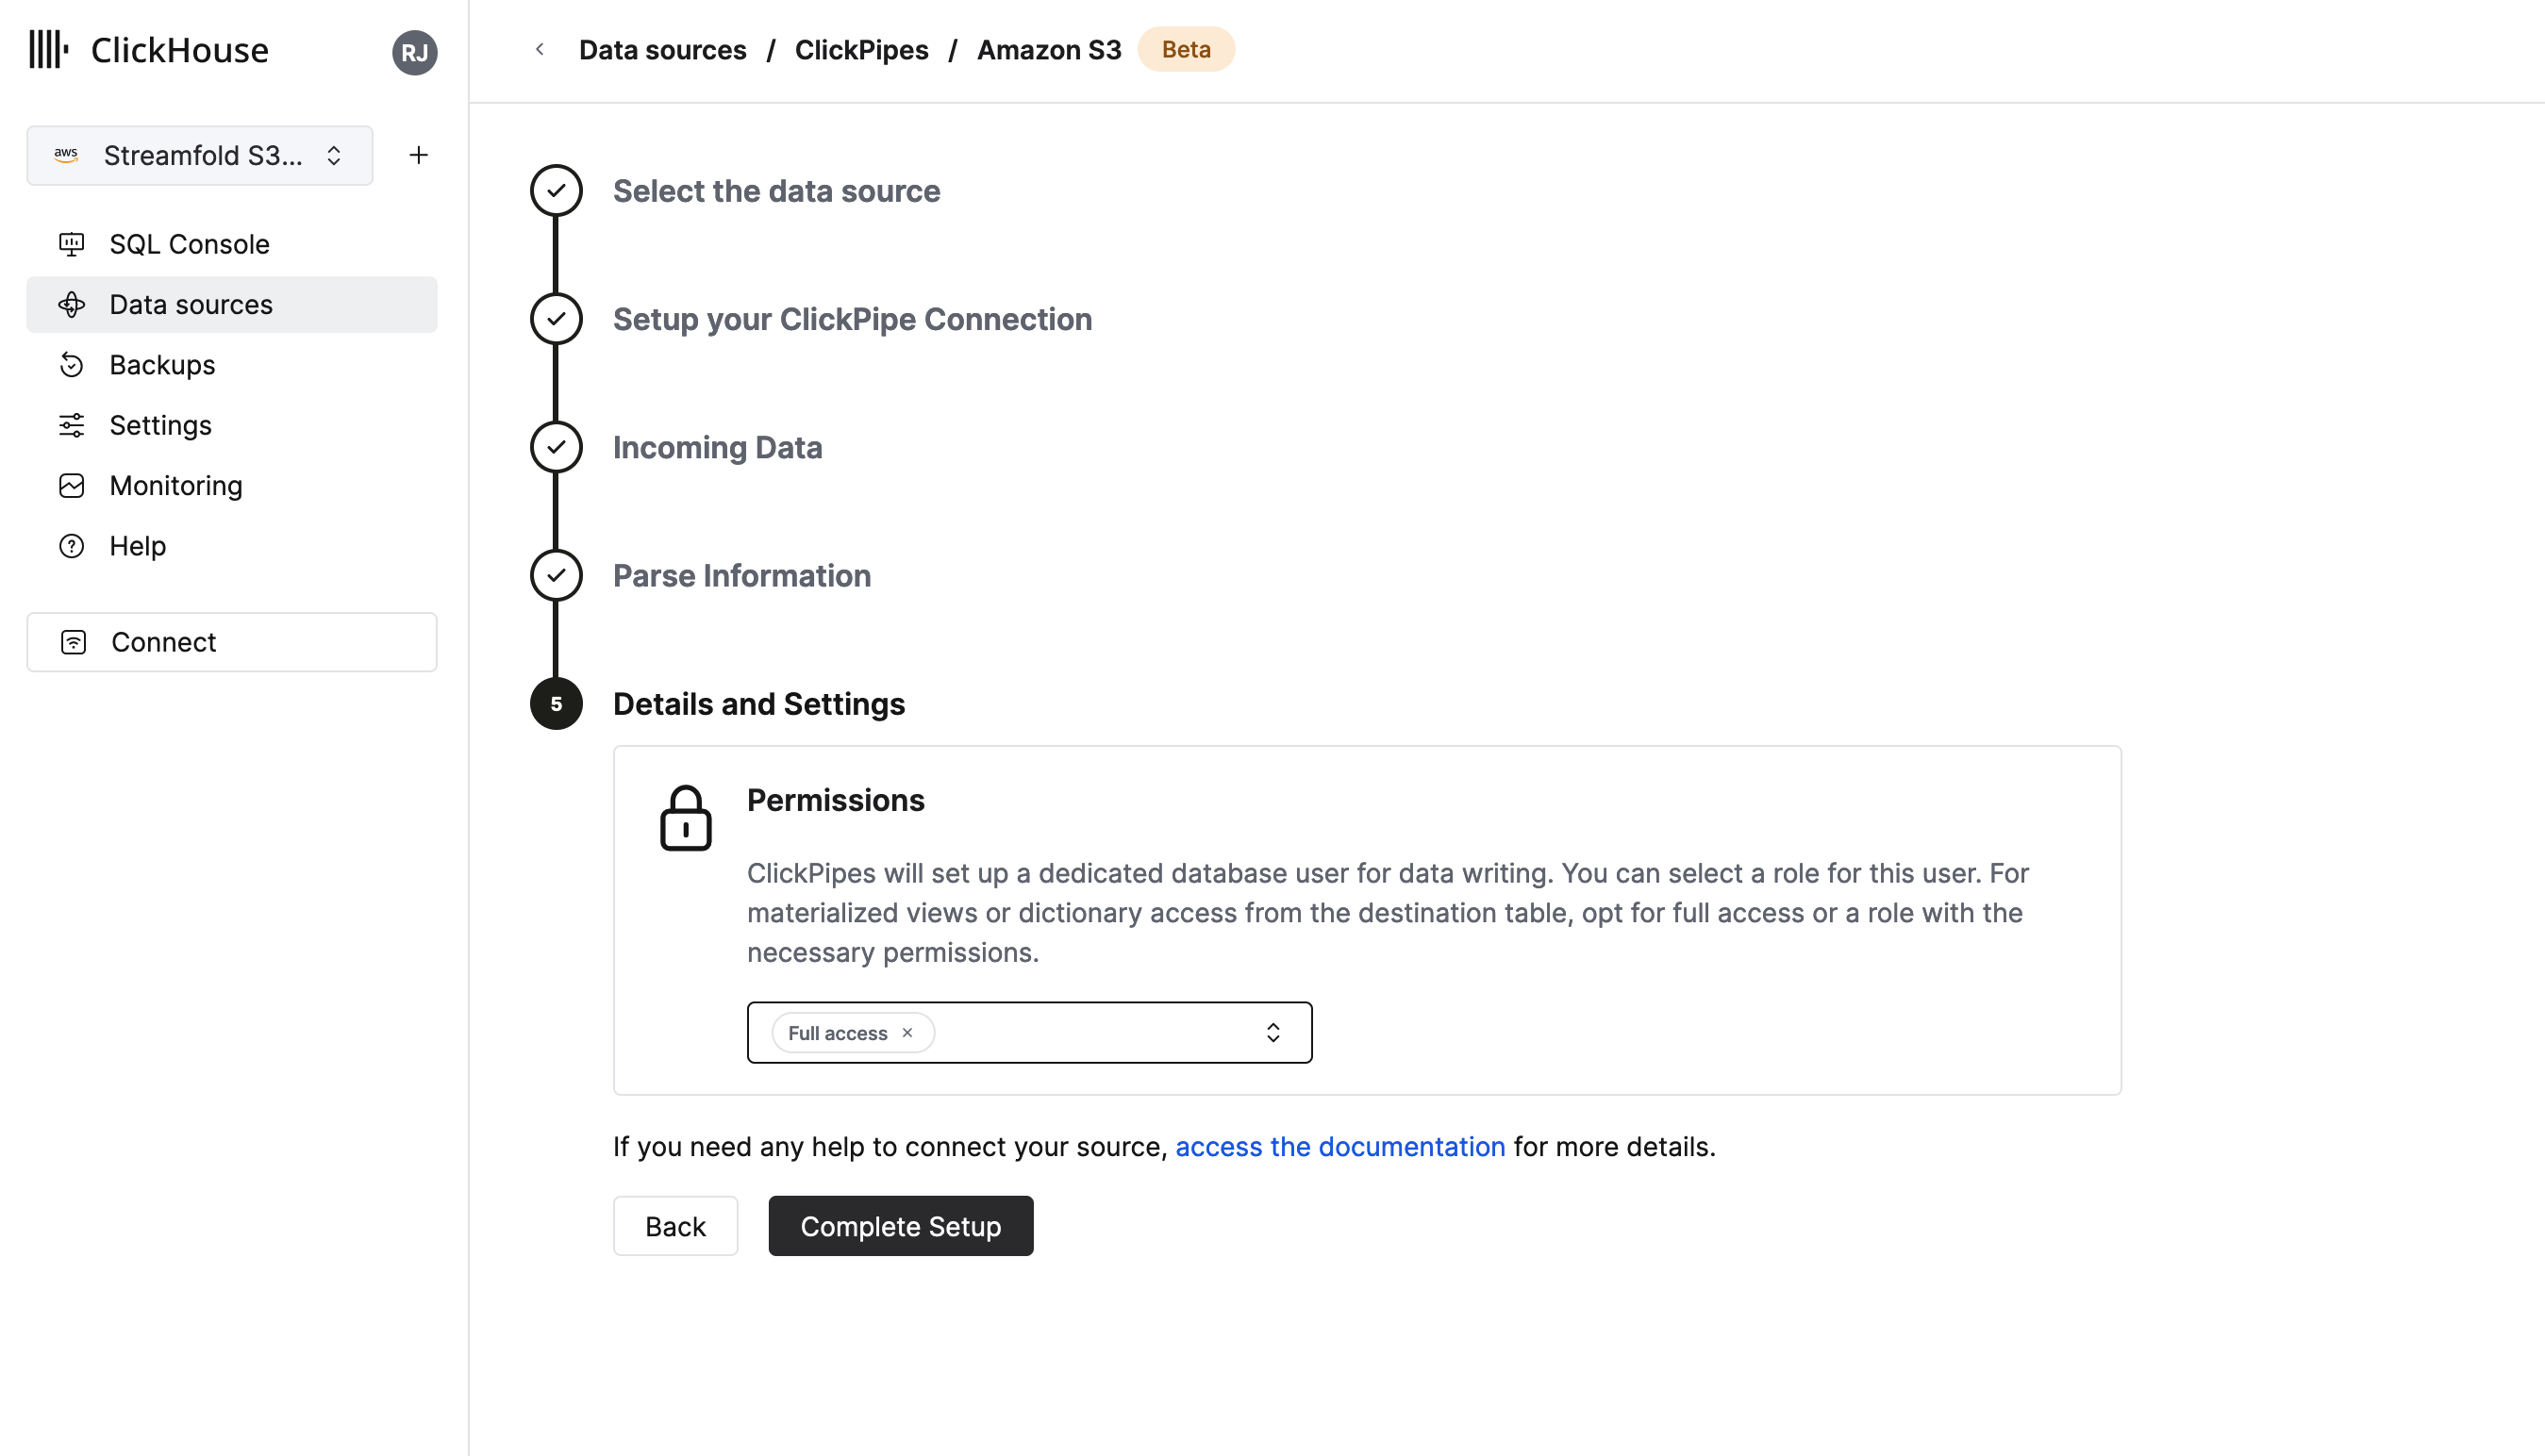
Details and Settings
For Permissions select Full access and then click Complete Setup
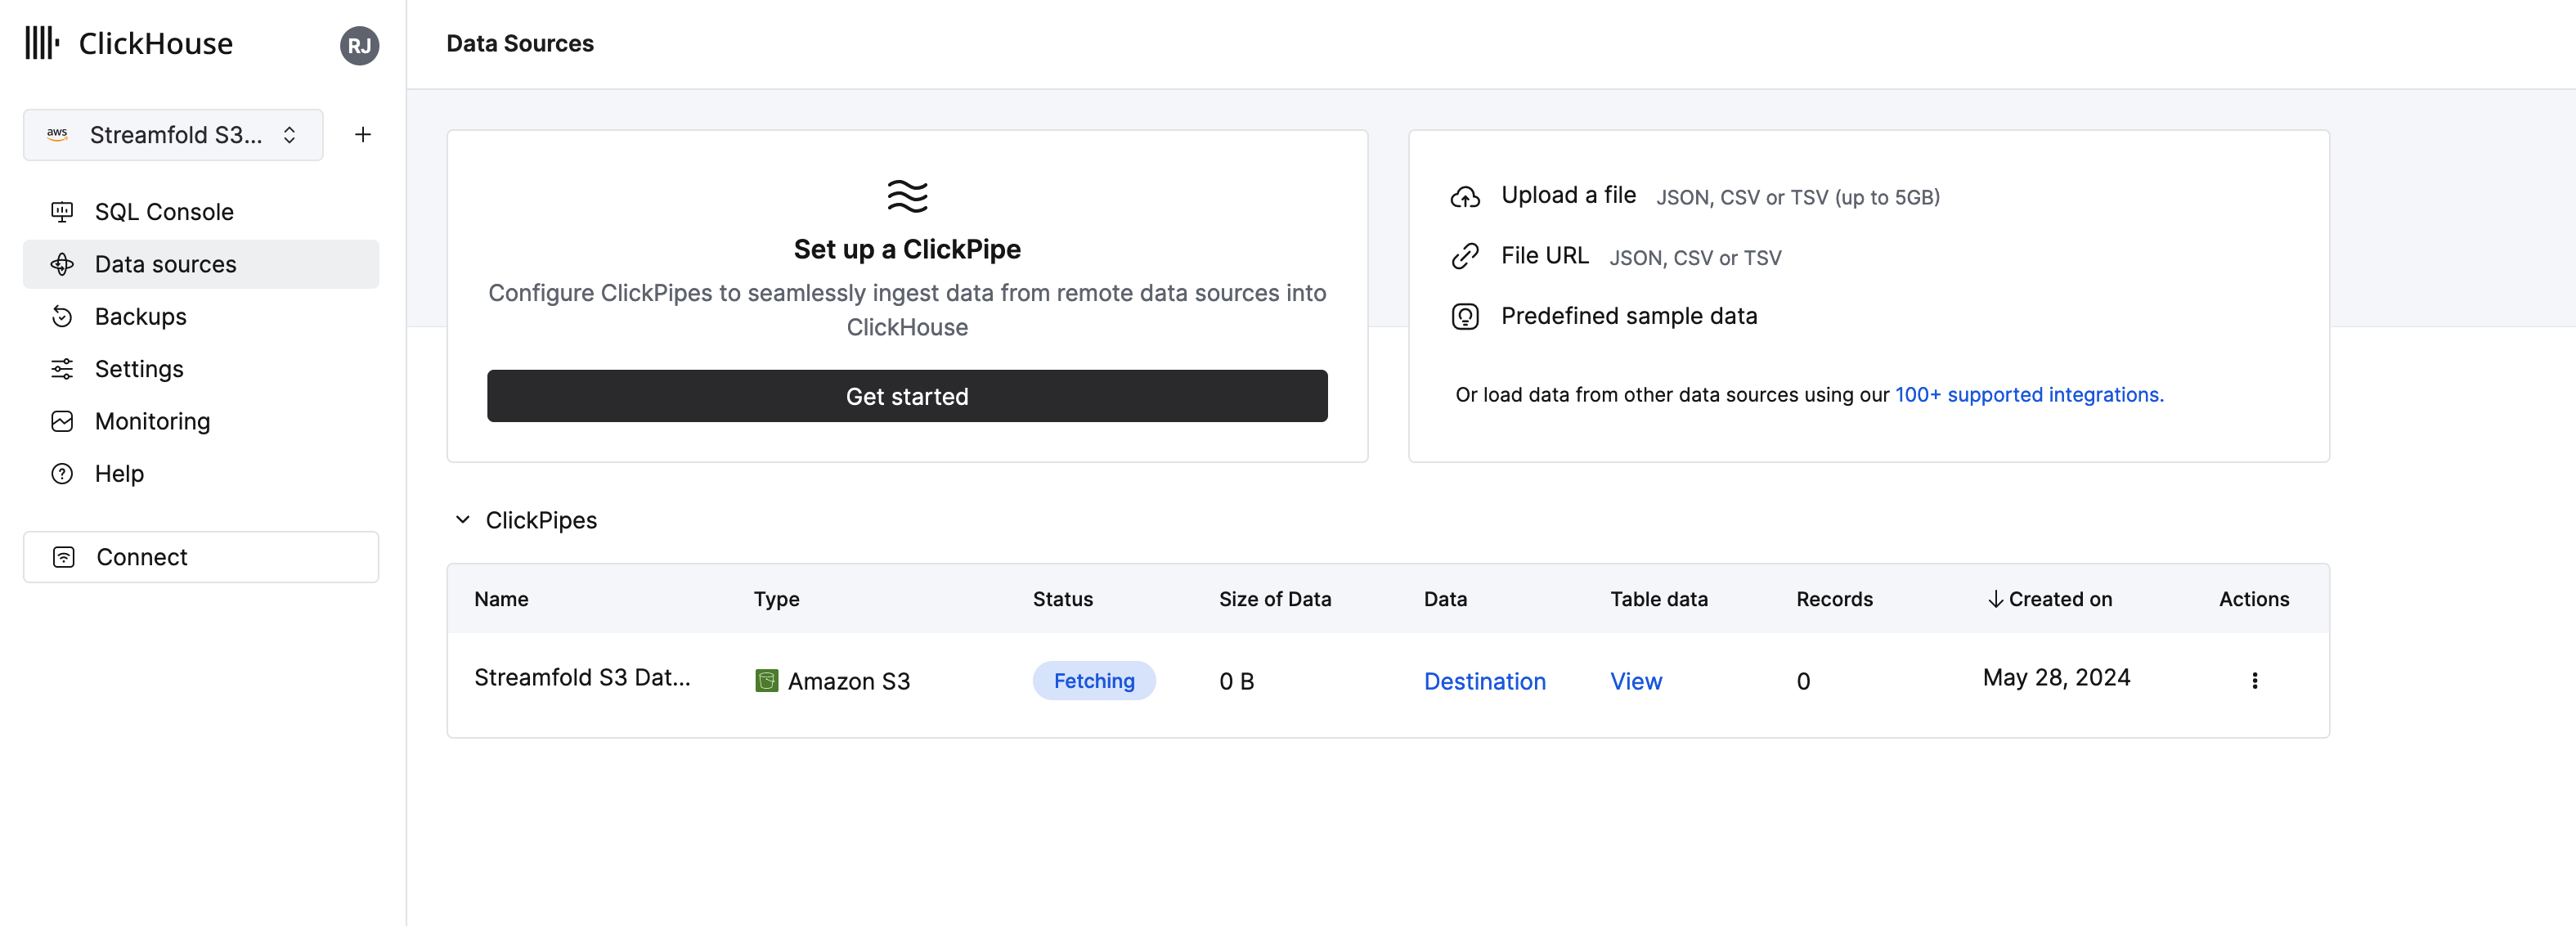
Loading and Complete
You should now see a view of your table which currently shows a status of Fetching
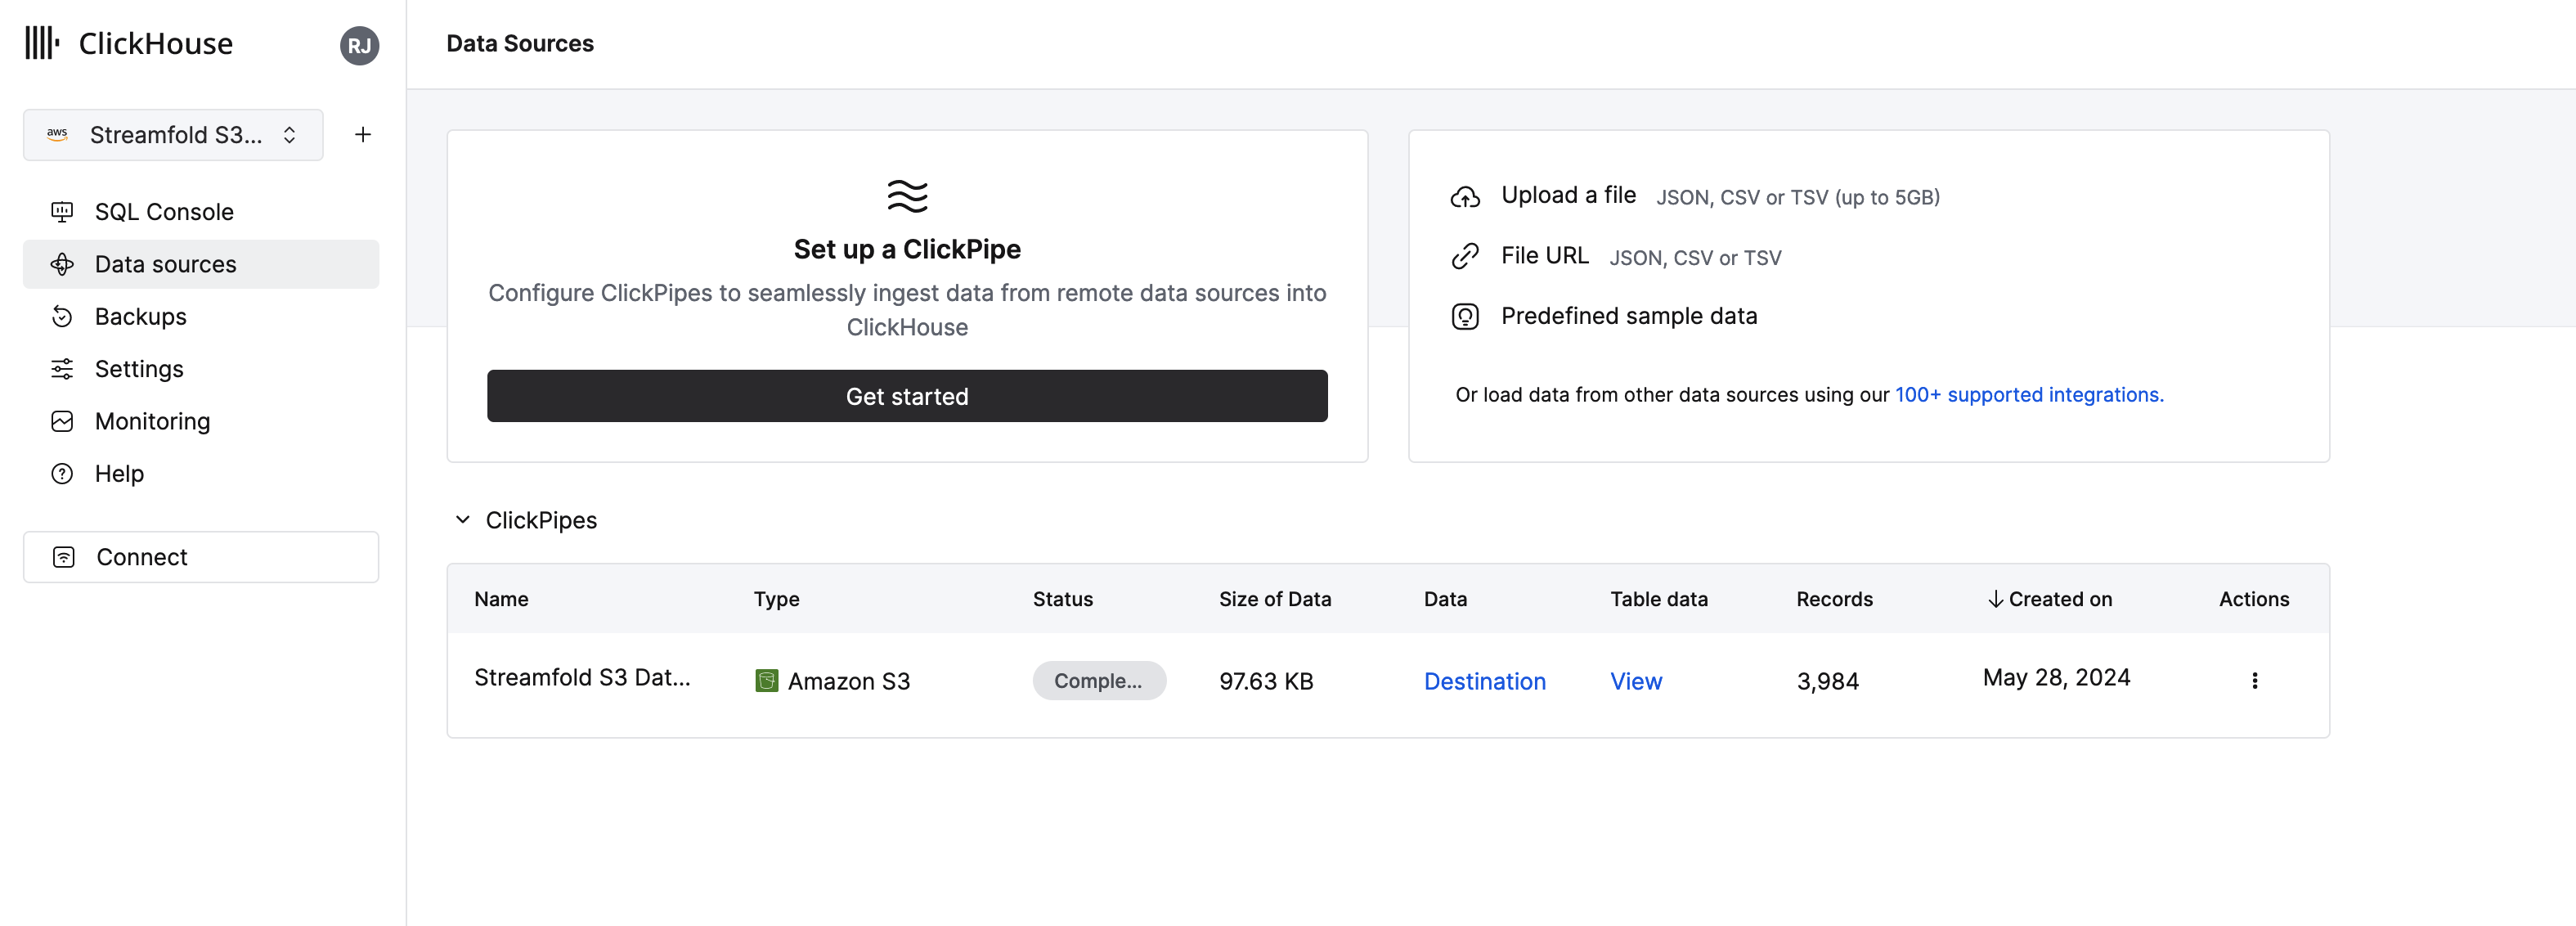
Once the data has been fetch and loaded your status should change to Complete
Query your Datadog logs in Clickhouse
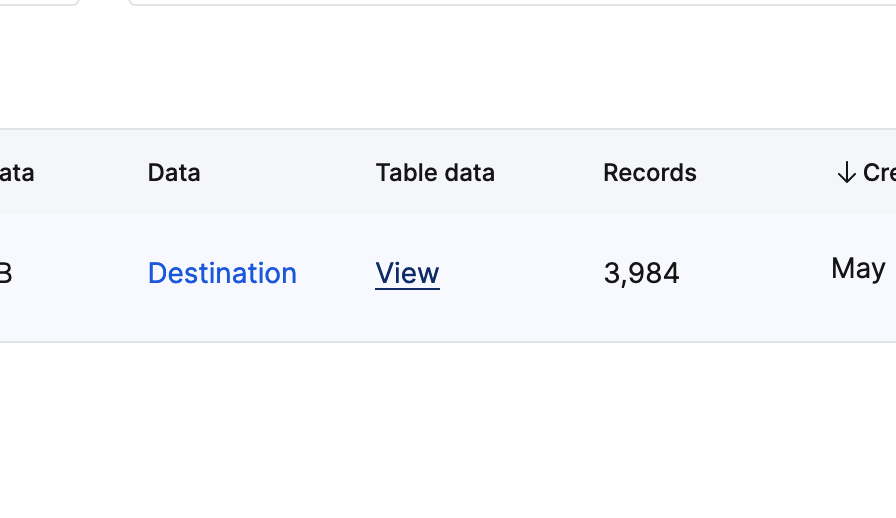
Now that your Streamfold S3 Datadog Logs ClickPipe has loaded, click the View link in the Table data column
You should now see a table populated with your Datadog logs you've captured with Streamfold!

To start digging into your data select click the New query button. You should be presented with a new empty tab. Your data will differ from the data we're using here in this guide because you've built your own telemetry lake! However, for the purposes of this guide let's run a few queries.
First let's get all log messages for our Kafka controllers. Type the following query into the query editor...
SELECT * FROM datadog_logs WHERE service='kafka-controller'
and then click Run.
Great we've narrowed down our log messages to just those from the service named kafka-controller

Now let's just select the messages column for any log messages from kafka-controller-0. To do this we'll replace the select * with the message column and add a LIKE clause to our query on the ddtags column.
SELECT message FROM datadog_logs WHERE service='kafka-controller' AND ddtags LIKE '%kafka-controller-0%'
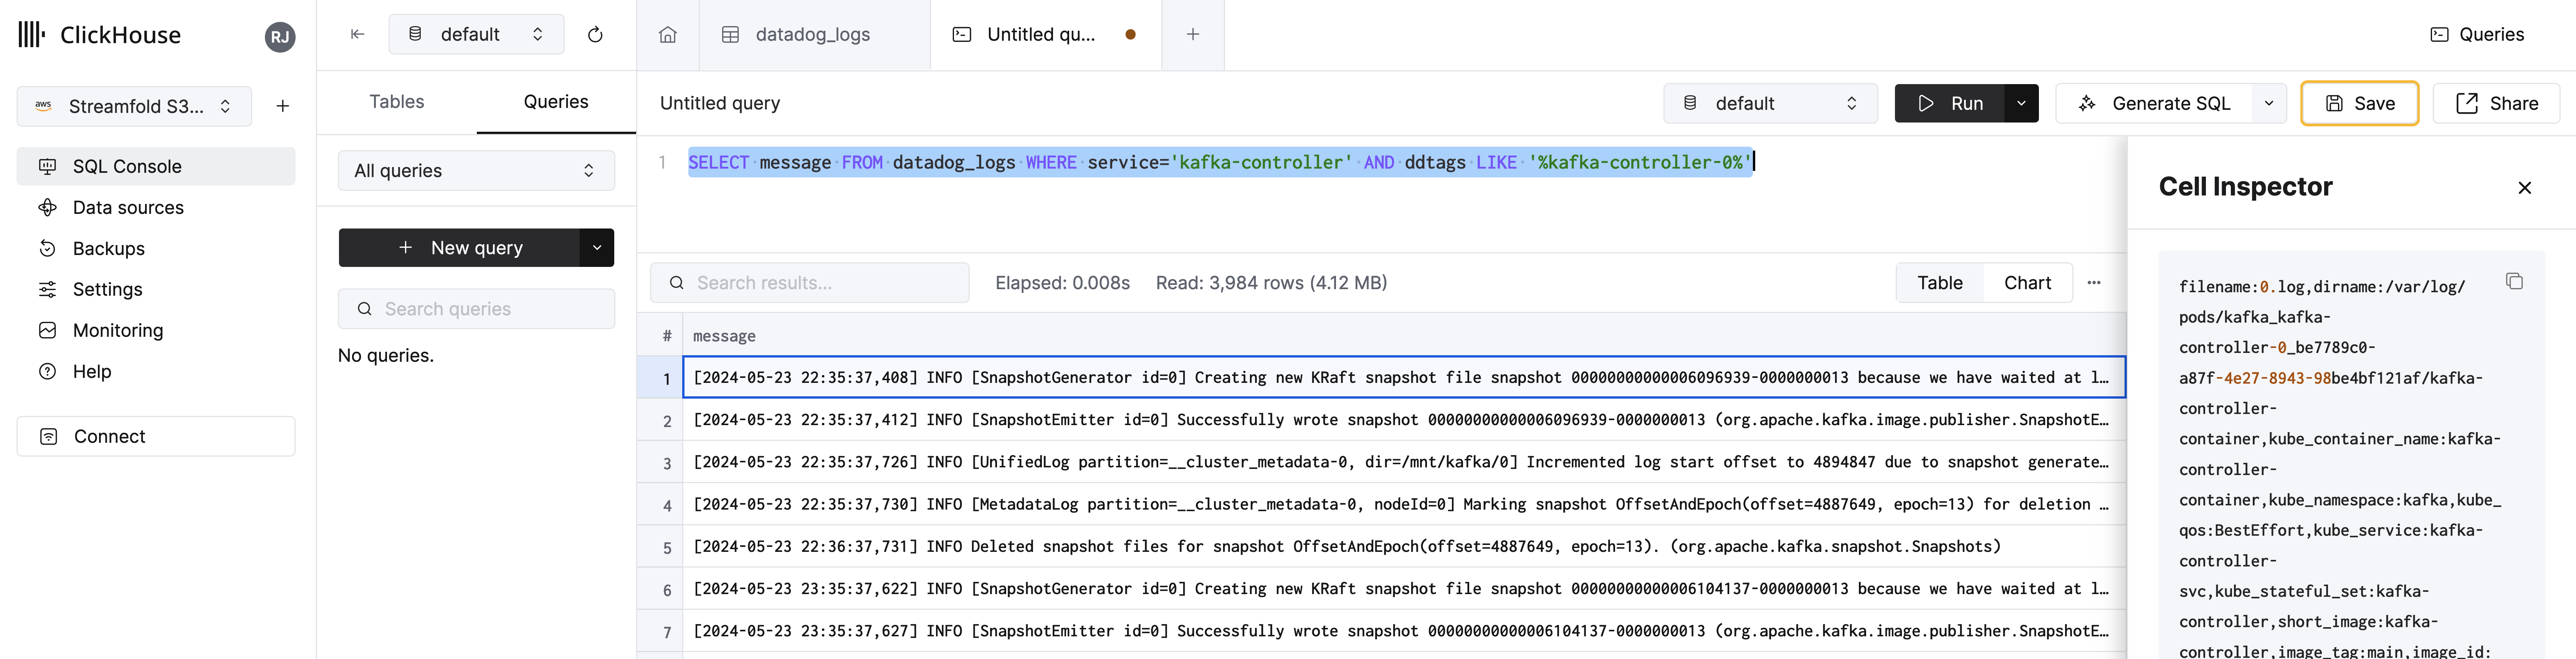
Awesome! You're well on your way to working with telemetry lakes and Streamfold!
Cleanup
If you want to remove your data from Clickhouse Cloud you can issue the following commands.
DROP TABLE datadog_logsDROP TABLE datadog_logs_clickpipes_error
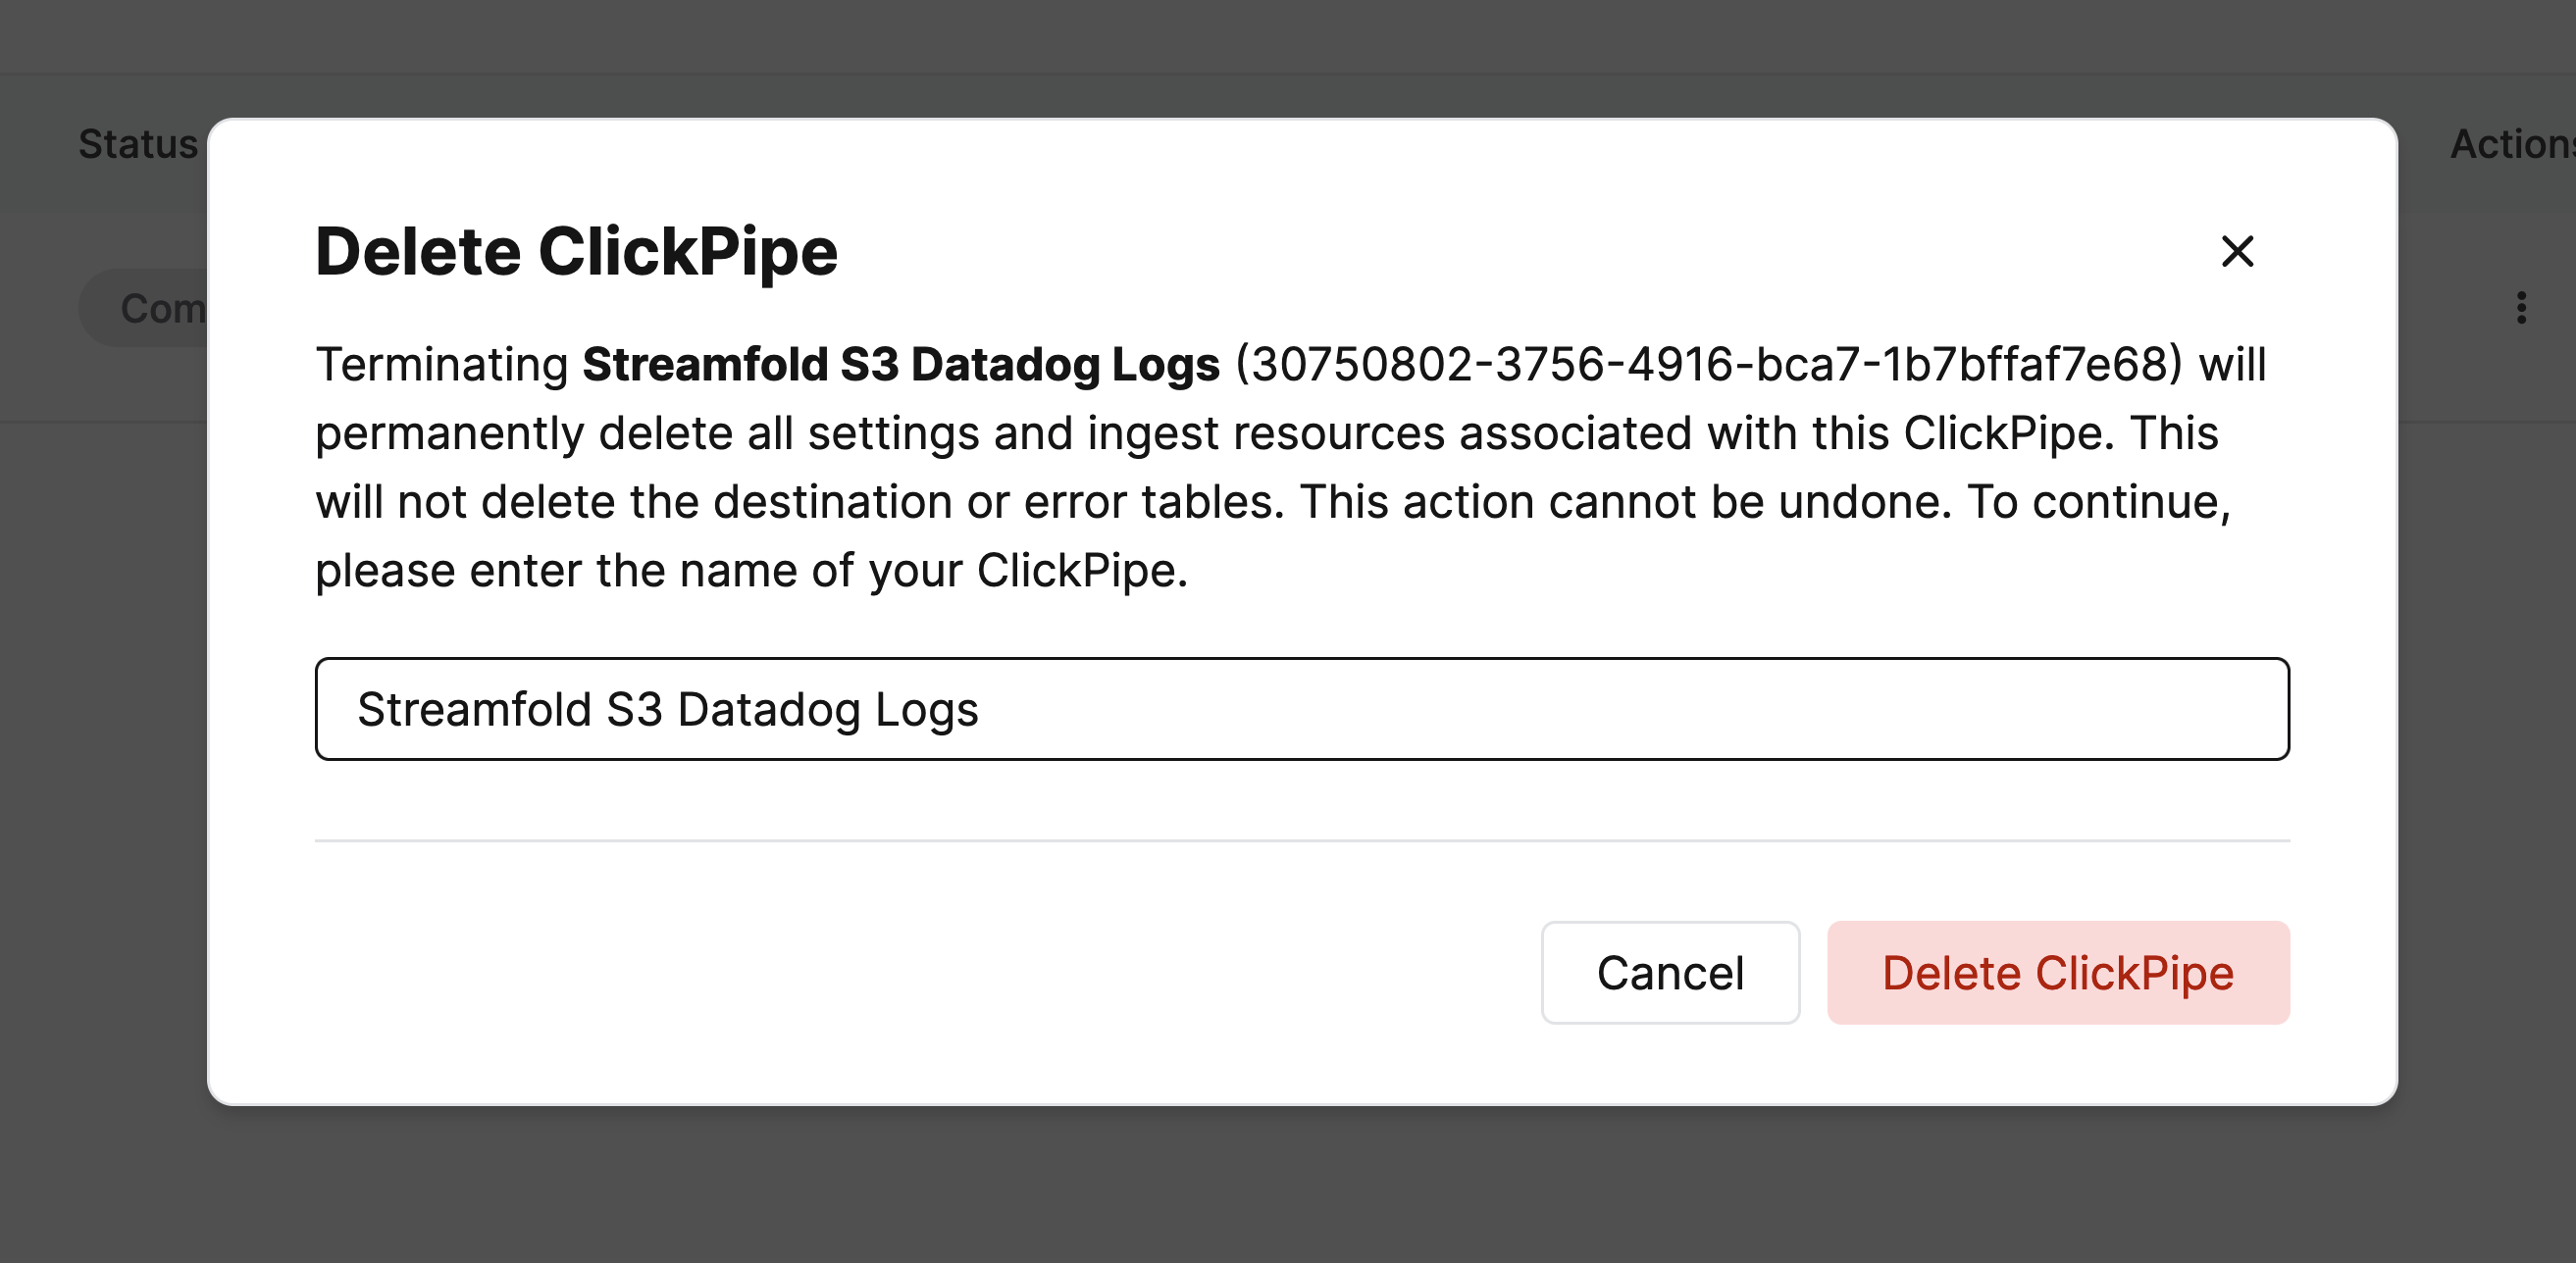
Then navigate back to Data sources, click the three dots under actions and click Remove. Enter Streamfold S3 Datadog Logs for the name of the Clickpipe and click Delete ClickPipe.
Next steps
Congratulations! You've created your first telemetry data lake and integrated with Clickhouse! Have fun digging into your data, we can't wait to hear about what you find!
- Grok fields from logs lines to transform your logs before sending to S3.
- Query your logs with AWS Athena or ingest them into Snowflake